Drilling into HDPE pipe feels risky. A mistake can cause leaks or damage. But with the right steps and tools, you can make a secure connection every single time.
The safest way to drill HDPE pipe is by using a mechanical saddle clamp specifically designed for the pipe's outer diameter. This supports the pipe wall. Then, use a sharp hole saw at a slow, controlled speed to prevent melting the plastic and ensure a clean cut.
Drilling into any water pipe needs care, but HDPE has its own unique challenges. Its flexibility is a huge benefit, but it also means you can't just treat it like a rigid metal pipe. Making a new connection, whether for a service line or a new branch, has to be done perfectly to avoid problems down the road. In my 30 years of manufacturing pipe fittings, I've learned that success comes from understanding the material and using the right process. Let's walk through exactly how to do it safely and efficiently, so you feel confident on every job.
How Can You Drill into HDPE Pipe Safely?
You worry about cracking the pipe or creating a weak spot. A single mistake can compromise the entire line. This guide ensures your connection is secure and leak-proof.
To drill HDPE pipe safely, you must first secure the area with a saddle clamp built for that specific pipe size. This prevents deformation. Always use a sharp cutter at low speed and wear proper personal protective equipment (PPE) like safety glasses and gloves.
HDPE is a fantastic material, but you have to respect its properties. It's much softer than iron or steel and can be sensitive to heat and pressure. The biggest secret to safe drilling is providing external support before you cut. This is the job of the saddle clamp. It wraps around the pipe and distributes the clamping force, preventing the pipe from ovalizing or deforming as you drill. This support is critical for creating a clean hole and a perfect, long-lasting seal. I've seen too many failures caused by people skipping this step or using the wrong type of clamp. Before you even think about starting the drill, you need to prepare the pipe and your tools.
Key Safety Checks Before You Start
A few minutes of preparation can save you hours of headaches. I always run through a quick mental checklist before my team starts any drilling job.
| Safety Check | Why It's Important |
|---|---|
| Inspect the Pipe | Look for deep scratches, gouges, or UV damage that could weaken the pipe wall. |
| Wear Proper PPE | Safety glasses are a must to protect from plastic shavings. Gloves improve grip. |
| Check Your Tools | Make sure your hole saw is sharp. A dull blade will melt, not cut, the HDPE. |
| Secure Work Area | Ensure you have stable footing and good lighting. Keep the area clean. |
What Tools Are Required for Drilling HDPE Pipe?
Using the wrong tools can turn a simple job into a disaster. Are you sure you have everything you need? Let's make sure you're prepared for a successful installation.
You need a saddle clamp specific to your HDPE pipe diameter, a hole saw or shell cutter, a slow-speed drill, pipe cleaning supplies, and personal protective equipment (PPE). For drilling a live pipe, a specialized hot tapping machine is also essential.
Having the right tools is half the battle. Over the years, I've seen people try to make do with whatever is in their truck, and it often leads to problems. HDPE requires a specific approach. You can't just use a high-speed drill and hope for the best. That will generate too much friction and heat, melting the plastic instead of cutting it. This creates a messy hole and a weak connection point. A slow, steady approach with the right equipment is the only way to guarantee a professional result. As a manufacturer, we design our fittings with these requirements in mind, but the installation is just as important as the product itself. Let's break down the essential toolkit.
Essential Drilling Toolkit
This table covers the must-have items for any HDPE drilling job. Having these on hand will make the process smooth and safe.
| Tool | Purpose | My Key Consideration |
|---|---|---|
| Saddle Clamp | Provides a seal and structural support. | This is the most critical part. It must be designed for HDPE. Avoid "universal" clamps. HDPE creeps, so a wide band is needed to maintain a seal over time. |
| Drilling Machine | Creates the hole in the pipe wall. | Use a drill with high torque and low speed. This prevents heat buildup and melting. A standard high-speed drill is the wrong tool for this job. |
| Hole Saw/Cutter | Cuts the coupon from the pipe. | It must be very sharp. A pilot drill bit helps center the cut perfectly. The size must match the outlet of your saddle clamp exactly. |
| Cleaning Supplies | Ensures a perfect seal between the pipe and gasket. | Use isopropyl alcohol and a lint-free cloth. Any dirt, grease, or moisture on the pipe surface can cause a slow leak later on. |
| PPE | Protects you from injury. | Safety glasses or a face shield and gloves are non-negotiable. Plastic shavings can fly out unexpectedly. |
How Can You Drill HDPE Pipe Without a Shutdown?
Shutting down a pipeline costs time and money. What if you could make a new connection while the system is still live? It is possible with the right technique and tools.
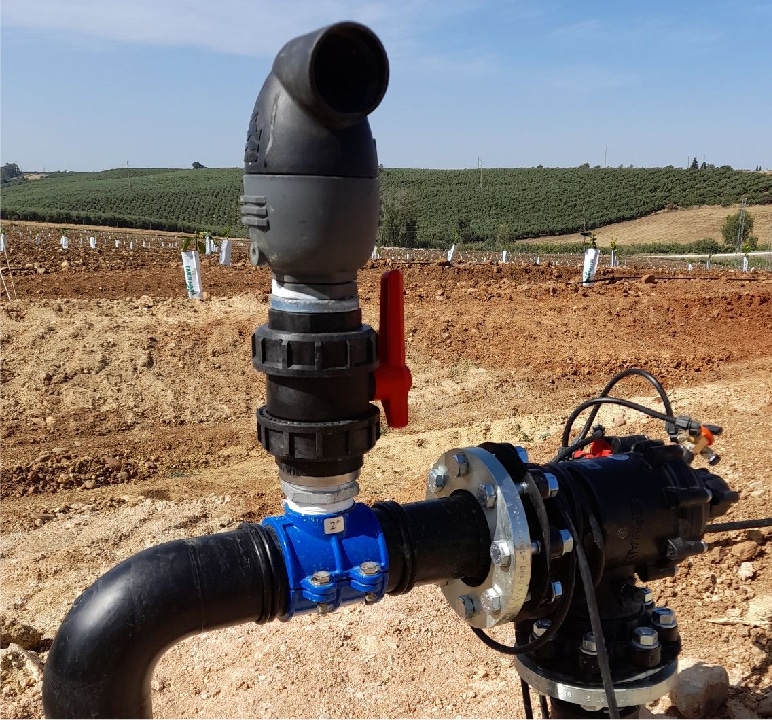
Drilling without a shutdown is called hot tapping. It uses a special tapping saddle and a tapping machine. This equipment creates a pressurized seal, allowing you to drill into the live pipe and remove the cut piece without any leakage or service interruption.
Hot tapping, or live tapping, is a game-changer for water utilities and industrial sites. It means you don't have to cut off water to hundreds of customers just to add one new service connection. But it has to be done with extreme care and precision. This process requires more specialized equipment than a standard shutdown drill. The core components are a tapping saddle or a tapping valve, and a tapping machine. The machine bolts directly to the saddle's valve, creating a sealed chamber. This allows you to drill through the pipe while it's under full pressure. We have supplied fittings for countless hot tapping projects, and the process is very reliable when the correct steps are followed.
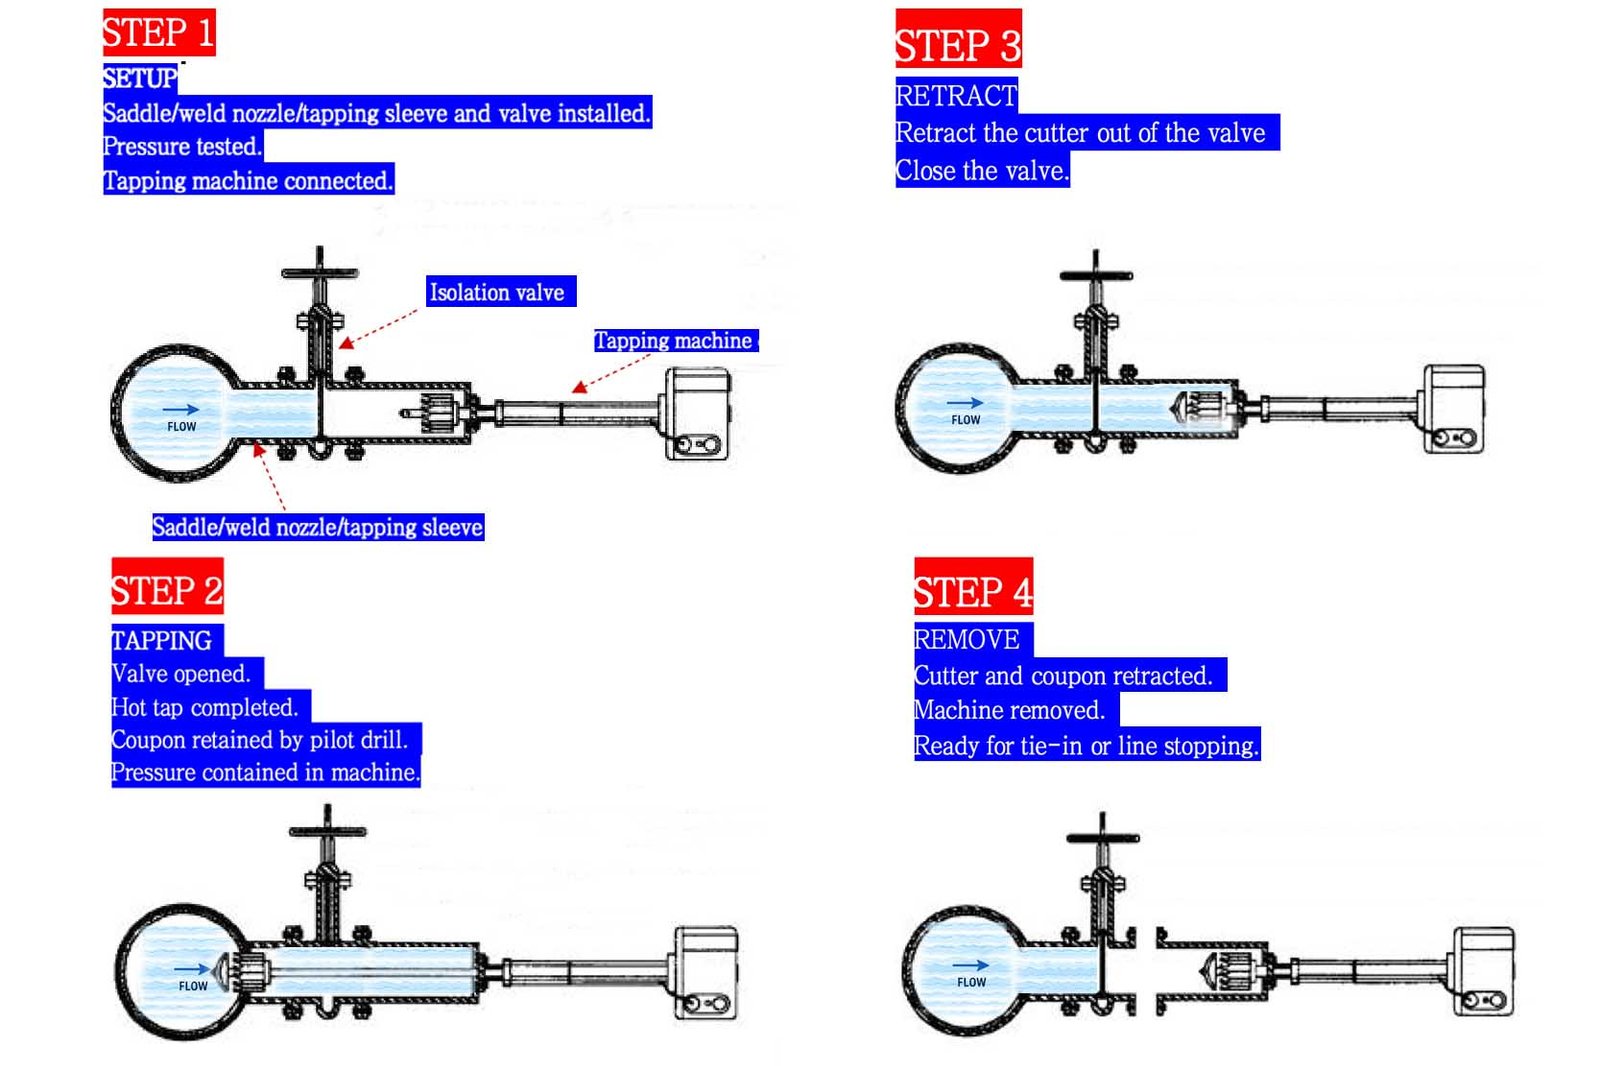
Step-by-Step Hot Tapping Process
- Inspect and Clean the Pipe. First, check the pipe area for any damage. Then, clean the surface where the saddle will sit. It must be perfectly clean and dry for the gasket to seal correctly.
- Install the Tapping Saddle. This is a critical step. Securely mount the tapping saddle around the pipe. Tighten the bolts to the manufacturer's recommended torque. The gasket must be compressed evenly to create a perfect seal against the live pipe.
- Pressure Test the Seal. Before drilling, you must test the seal. Most tapping saddles have a test port. You can apply a small amount of pressure to check that the gasket and flanges are completely sealed against the pipe.
- Mount the Tapping Machine. Attach the tapping machine to the outlet of the saddle. Open the valve on the saddle completely.
- Drill the Pipe. Slowly advance the cutter through the open valve and into the pipe wall. Use a slow, steady rotation. You will feel when the cutter has gone all the way through the pipe wall.
- Retract and Close Valve. The tapping machine is designed to retain the cut piece of pipe, called a coupon. Retract the cutter fully, pulling the coupon back into the machine's housing. Then, close the saddle's valve completely.
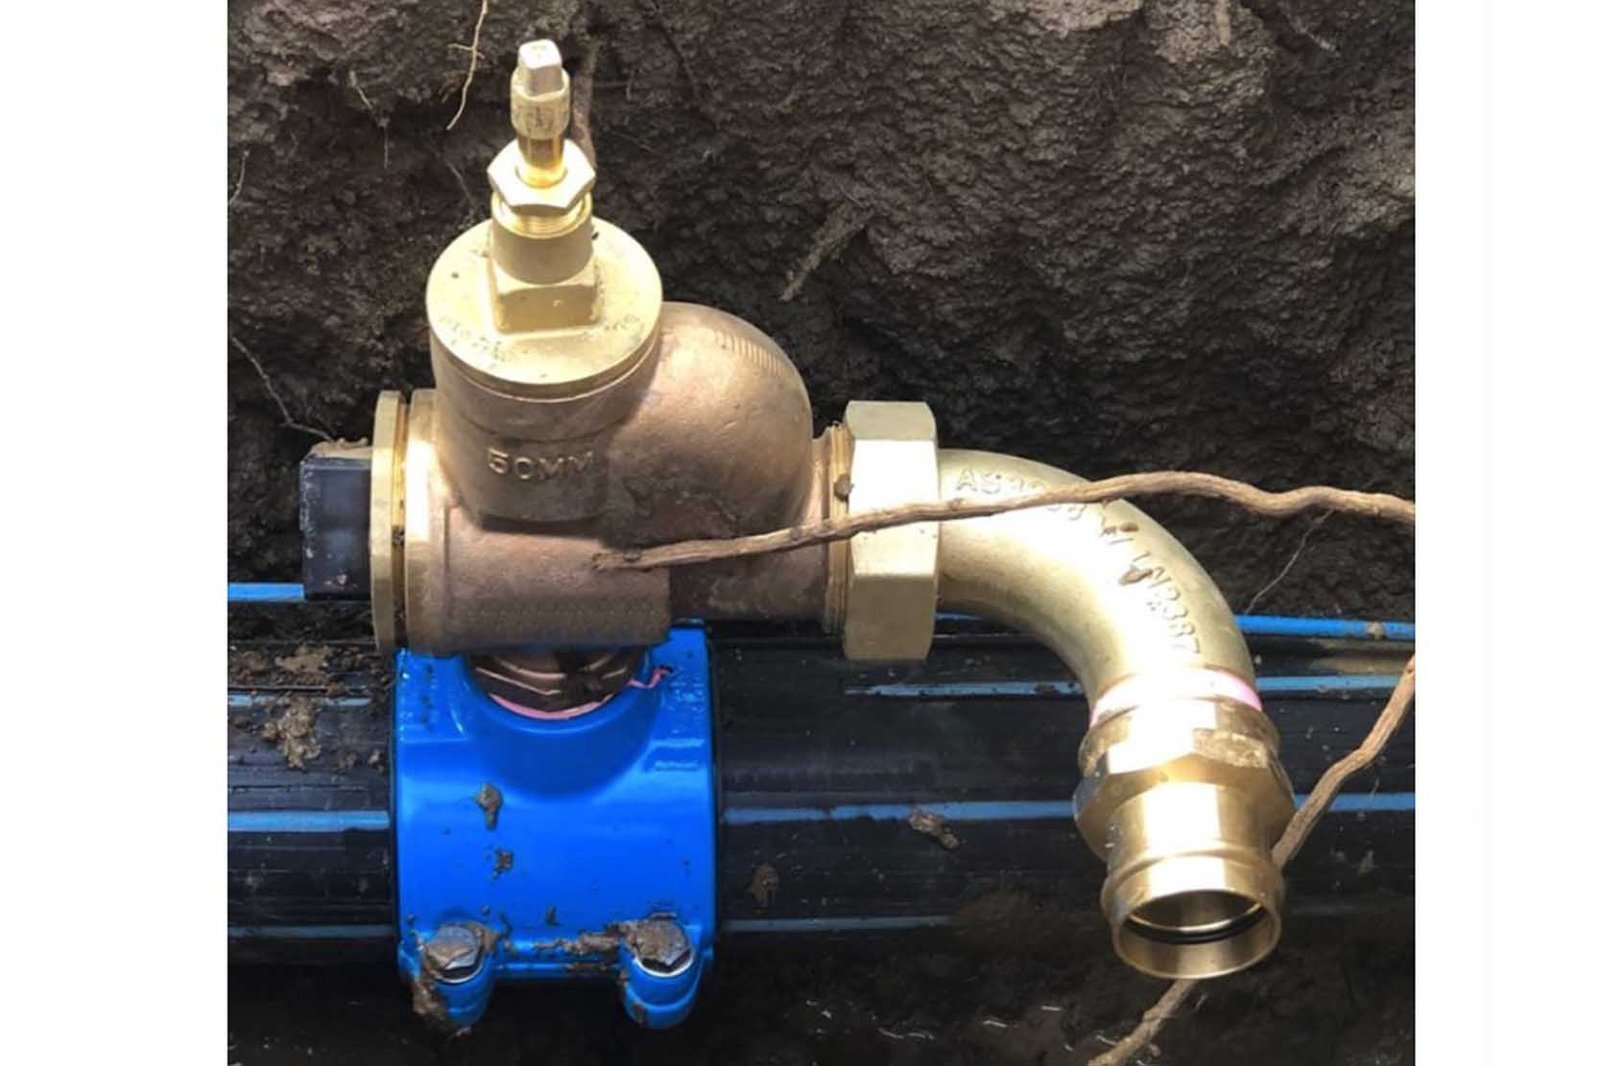
- Remove the Machine. With the valve closed, the new connection is sealed off. You can now safely remove the tapping machine and connect the new service line.
How Do You Drill HDPE Pipe with a Shutdown?
Sometimes a shutdown is necessary or simply the safer option. How do you ensure the process is quick and flawless to minimize downtime for your customers? Let's review the steps.
For drilling with a shutdown, first isolate, depressurize, and drain the pipeline. Then, install a mechanical saddle clamp, drill through the pipe with a standard hole saw, clean out the shavings, and then restore pressure to the system.
Drilling on a depressurized pipe is more straightforward than hot tapping and requires less specialized equipment. This makes it a common method for planned maintenance or new construction projects where the system is not yet live. While it's simpler, the core principles of drilling HDPE remain the same. You still need to support the pipe wall with a proper saddle, use a sharp cutter, and drill at a slow speed. The main advantage here is that you can visually inspect your cut and easily clean out any plastic shavings before you close up the connection. This reduces the risk of debris flowing downstream and causing problems in meters or valves.
The Shutdown Drilling Method
- Isolate and Drain. The first step is to safely shut down the water supply to the section you're working on. Use main valves to isolate the area and then open a low point to drain the water completely.
- Clean the Pipe Surface. Just like with hot tapping, the pipe surface must be spotless. Any dirt or grease will compromise the gasket seal. Use a cleaner and a clean rag.
- Install the Saddle Clamp. Position the saddle clamp and tighten the bolts evenly. In our experience as a manufacturer, uneven tightening is a common cause of leaks. Use a torque wrench to ensure it matches the specifications.
- Drill the Hole. With your slow-speed drill and sharp hole saw, drill through the saddle's outlet into the pipe. Apply steady, light pressure. Let the tool do the work. Forcing it will generate heat and melt the HDPE.
- Deburr and Clean. Once the hole is cut, retract the hole saw. Reach into the pipe and remove the coupon. Use a cloth or a shop vacuum to remove all plastic shavings from inside the pipe. This step is very important.
- Complete the Connection and Test. You can now install your corporation stop or other fitting into the saddle. Once everything is connected, slowly open the main valve to repressurize the line. Carefully check your new connection for any leaks.
What Are Common Mistakes and Safety Tips to Remember?
A small mistake can lead to big problems like leaks or pipe failure. Are you aware of the common pitfalls? Let's make sure you avoid them on your next job.
The most common mistakes are using a universal saddle not made for HDPE, drilling too fast which melts the plastic, and poor surface preparation. Always use HDPE-specific fittings, control your drill speed, and ensure the pipe is perfectly clean before installation.
After three decades in this business, I can tell you that almost every failure I've investigated comes down to one of a few simple, avoidable mistakes. HDPE is a forgiving material in many ways, but it has specific requirements. Trying to take shortcuts or using the wrong products will eventually cause problems. A leak that appears weeks or months after the installation is often traced back to a small error made on the day of the job. Understanding these common pitfalls is the best way to ensure every connection you make is strong, secure, and will last for decades. Let's look at the top errors I see and how to easily avoid them.
Avoiding Costly Errors
This table highlights the mistakes I see most often in the field. Avoiding them is key to a long-lasting, leak-free installation.
| Mistake | The Problem It Causes | My Solution |
|---|---|---|
| Using a "Universal" Saddle | HDPE pipe has a unique property called creep. Over time, it will slowly deform under pressure. A narrow, universal clamp doesn't provide enough support, leading to a loss of seal and leaks. | Always use a wide-band saddle specifically designed for the exact HDPE pipe outside diameter (OD). This is the #1 rule we follow when designing our own products. |
| Drilling Too Fast | High speed generates friction and heat. This melts the HDPE instead of cutting it. It creates a messy hole with a raised lip that prevents the gasket from sealing properly. | Use a slow-speed, high-torque drill. Let the sharpness of the cutter do the work. You are shaving the plastic, not melting your way through it. |
| Poor Surface Preparation | Dirt, mud, grease, or even moisture on the pipe surface creates a path for water to escape under the gasket. It might not leak right away, but it will eventually. | The pipe must be clean and dry. I tell my team to clean an area larger than the saddle gasket itself, just to be sure. Use a degreasing cleaner for the best results. |
| Not Removing the Coupon | The piece of pipe you cut out can get pushed into the main. It then travels downstream where it can clog a water meter, a valve, or a small service line, causing a major headache. | Ensure your hole saw is designed to retain the coupon. For hot tapping, the machine does this automatically. For shutdown drilling, you have to manually remove it. Never leave it inside the pipe. |
Conclusion
Drilling HDPE safely is about using the right saddle for the pipe, controlling your drill speed, and being meticulous. Following these steps ensures a secure, leak-free, and lasting connection.
