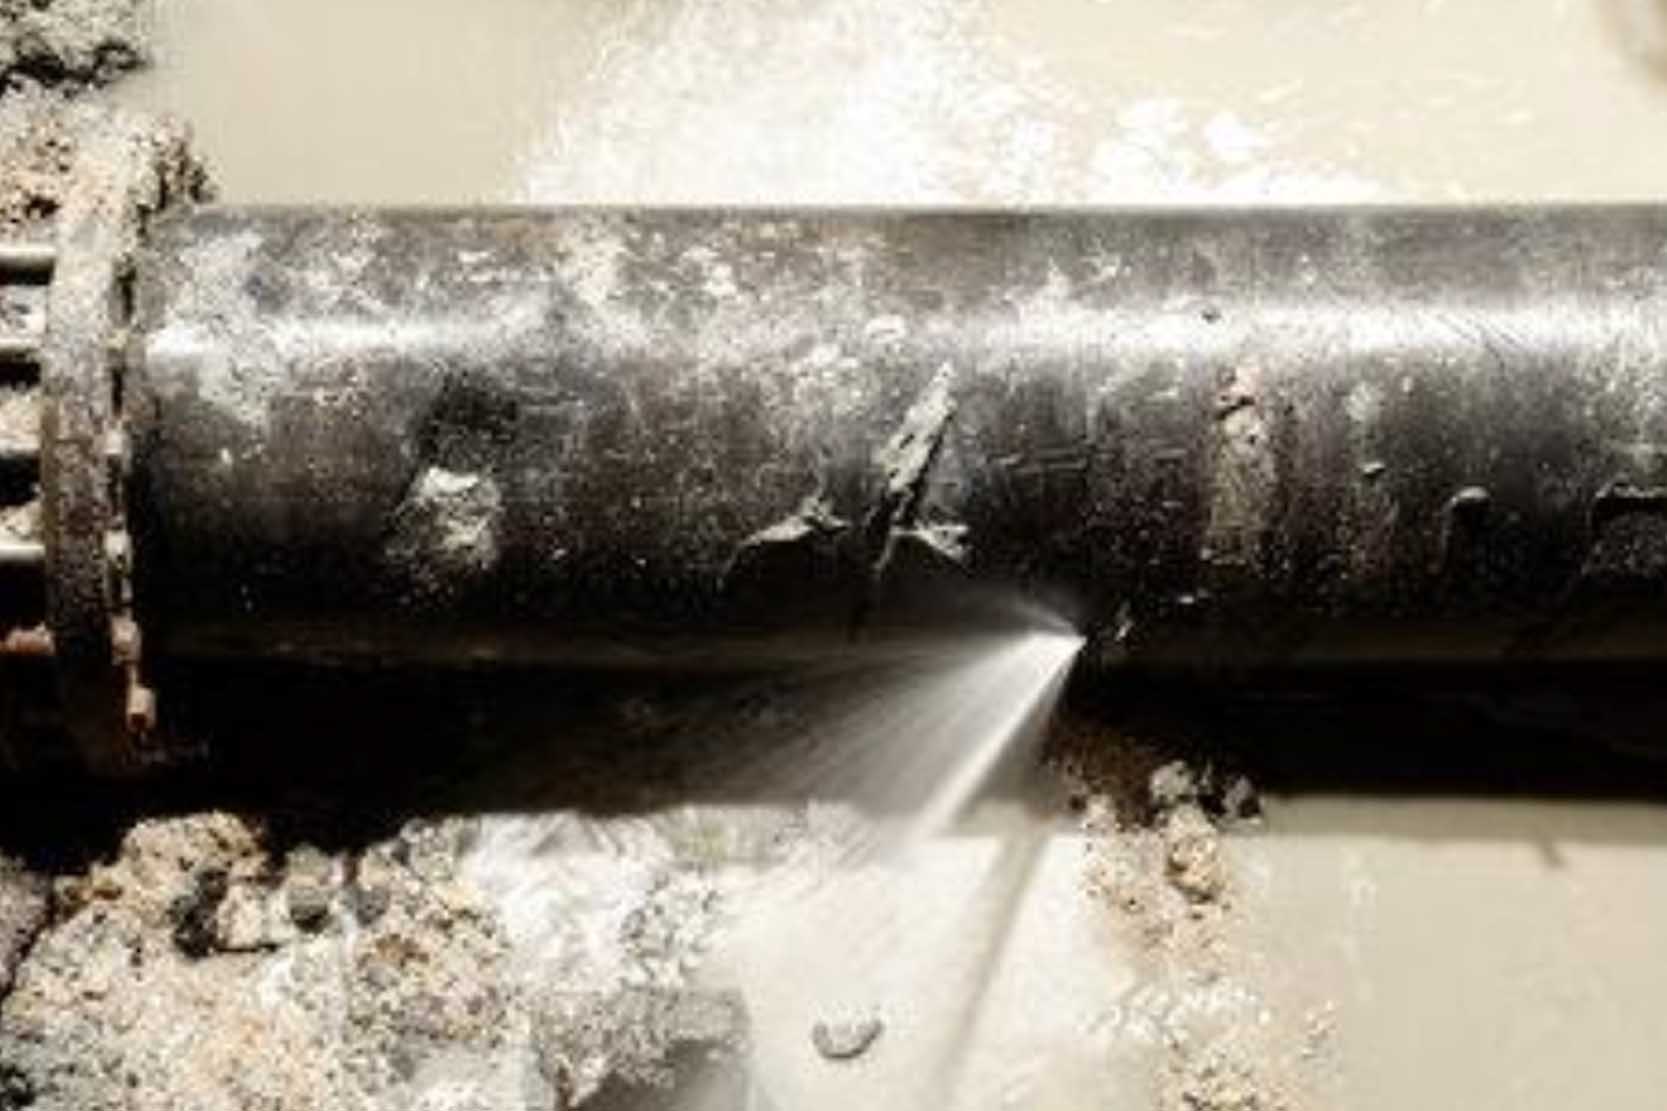
A leaking pipe can disrupt operations and cause costly downtime. You need a fast fix, but shutting down the entire line is not always an option. What if you could fix it live?
Yes, you can repair many pipe leaks without a shutdown. The key is using the right equipment, like a pipe repair clamp or a composite wrap . This method allows you to seal the leak while the line remains operational, saving critical time and money.

I've been in the pipe fitting business for 30 years, and I've seen it all. A full shutdown can be a logistical nightmare, especially for critical water mains or industrial process lines. The good news is that technology has given us solutions to keep things flowing. This guide is based on my hands-on experience helping clients solve these exact problems. We will walk through the entire process, step-by-step, to make sure your next live repair is a success. Let's get started.
What Types of Pipe Leaks Can Be Repaired Without Shutdown?
Not all leaks are the same. You see water, but you're not sure if it's a simple fix or a major problem. Choosing the wrong approach can make the situation worse.
You can repair pinholes, small cracks, and corrosion pitting on straight pipe sections without a shutdown. Specialized clamps also allow for live repairs on leaking joints and flanges. However, catastrophic failures or large blowouts always require a full shutdown and pipe replacement.
In my experience, the decision to perform a live repair comes down to safety and feasibility. You have to assess the type and severity of the damage. A small drip from a pinhole caused by corrosion is a perfect candidate for a repair clamp. The same goes for a slow seep from a socket-spigot joint that has a failing gasket. These are contained issues. On the other hand, a long, running crack that is actively growing or a hole that is gushing water under high pressure is a different story. These situations indicate a loss of the pipe's structural integrity. Trying to clamp a pipe that is about to burst is dangerous and ineffective. The table below breaks down common scenarios.
| Leak Type | Suitable for Live Repair? | Recommended Method |
|---|---|---|
| Pinhole Leaks | Yes | Standard Repair Clamp |
| Small Cracks (non-growing) | Yes | Standard Repair Clamp |
| Corrosion Pitting | Yes | Standard Repair Clamp |
| Leaking Bell/Spigot Joint | Yes | Bell Joint Repair Clamp |
| Leaking Flange Gasket | Yes | Flange Repair Clamp |
| Large Rupture or Blowout | No | Shutdown and Replacement |
| Long Longitudinal Crack | No | Shutdown and Replacement |
Step 1: Identify Leak Location and Pipe Condition?
You see a puddle, but where is it coming from? A wrong guess means you might repair the wrong spot, and the leak continues. This wastes time, materials, and your credibility.
First, pinpoint the exact source of the leak. Is it on a straight pipe, a joint, a bend, or a fitting? Then, assess the overall pipe condition. Look for heavy corrosion or deep cracks that might signal a bigger problem than just a simple leak.
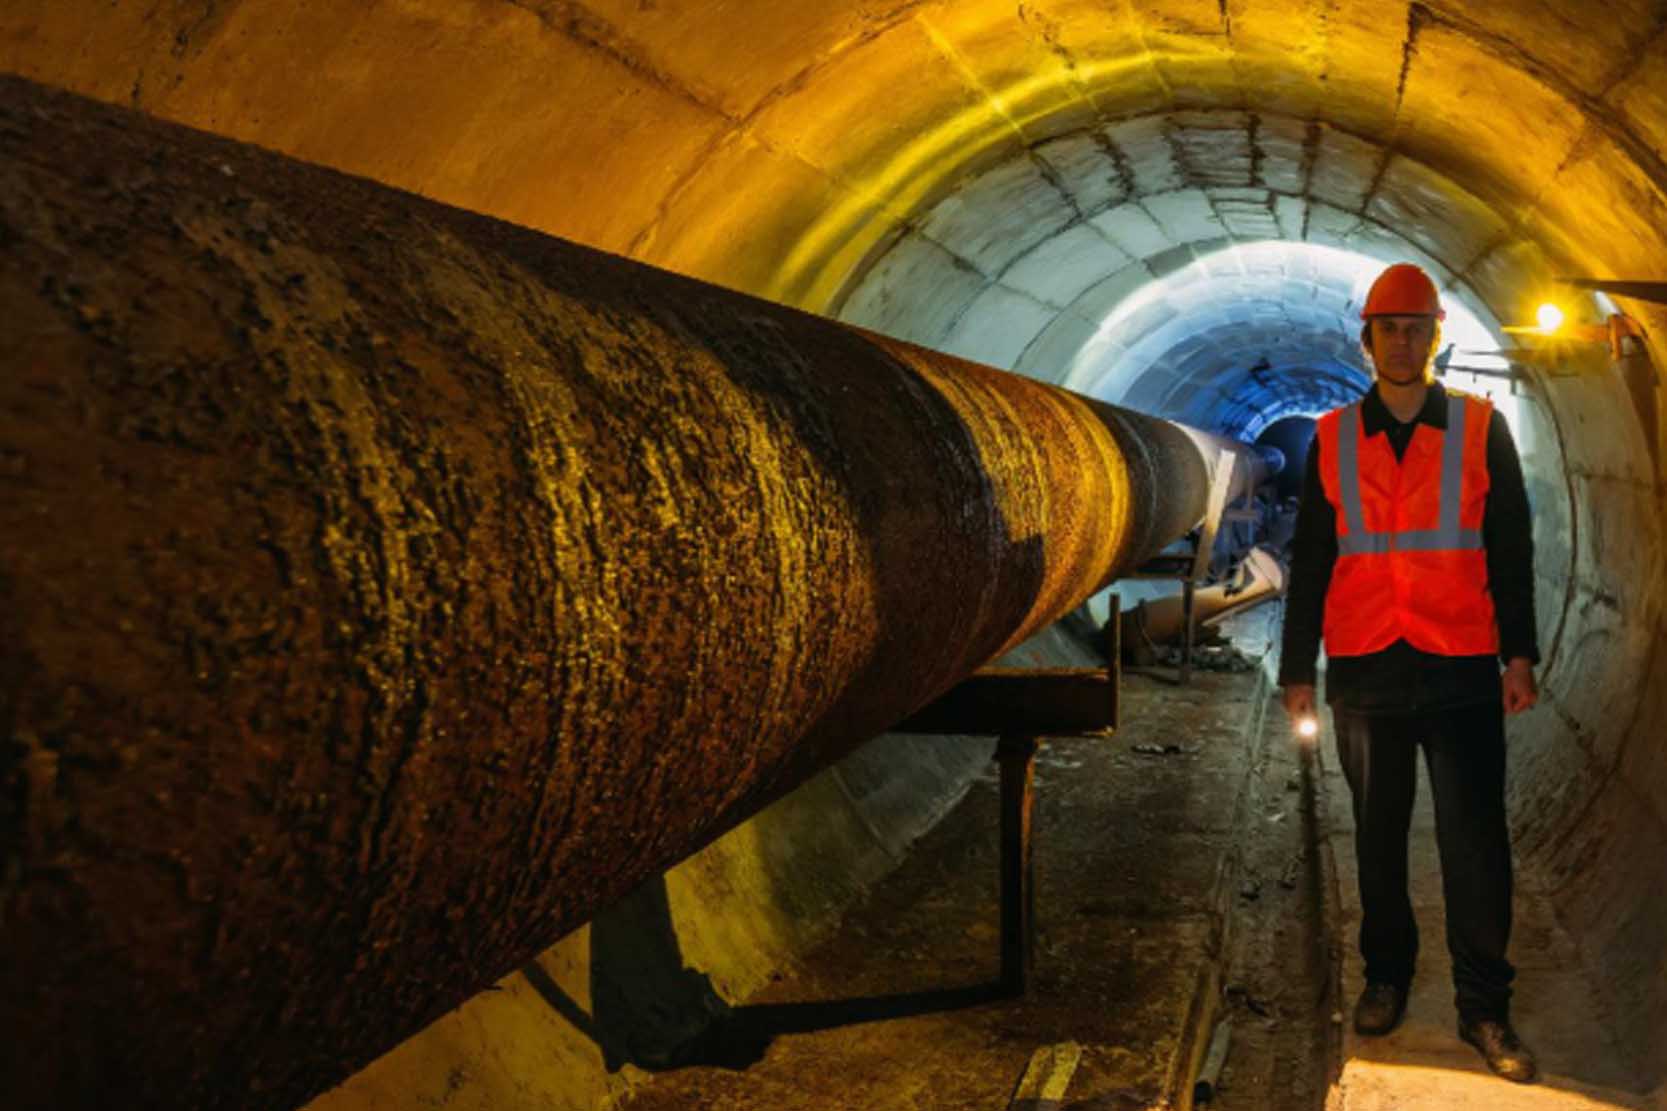
Before you even think about grabbing a tool, you need to become a detective. The first job is to clean the area around the suspected leak. Get rid of the mud, dirt, and any loose coating. You can't fix what you can't see. Once it's clean, use a flashlight to get a good look. Is the water coming from a tiny hole? Or is it weeping from a long, thin crack? Is the leak at a socket joint where the gasket might have failed? The location dictates the type of repair clamp you will need.
Next, broaden your view. Look at the pipe for five feet in each direction. Do you see excessive corrosion? Is the pipe sagging or showing signs of stress? Tap it with a hammer (gently!). A solid ring is good; a dull thud can indicate a thin pipe wall about to fail. Understanding the overall health of the pipe is critical. A clamp can fix a leak, but it cannot restore structural integrity to a pipe that is failing.
Step 2: Choose the Right Repair Method (Clamp vs Wrap vs Replacement)?
You've found the leak. Now what? You have options, but picking the wrong one means the leak will be back, probably at the worst possible time. This is a crucial decision point.
For most pinholes and stable cracks, a stainless steel repair clamp is the fastest and most reliable permanent solution. Composite wraps work for awkward shapes but can be less durable. Full replacement is the only choice for severe structural damage.
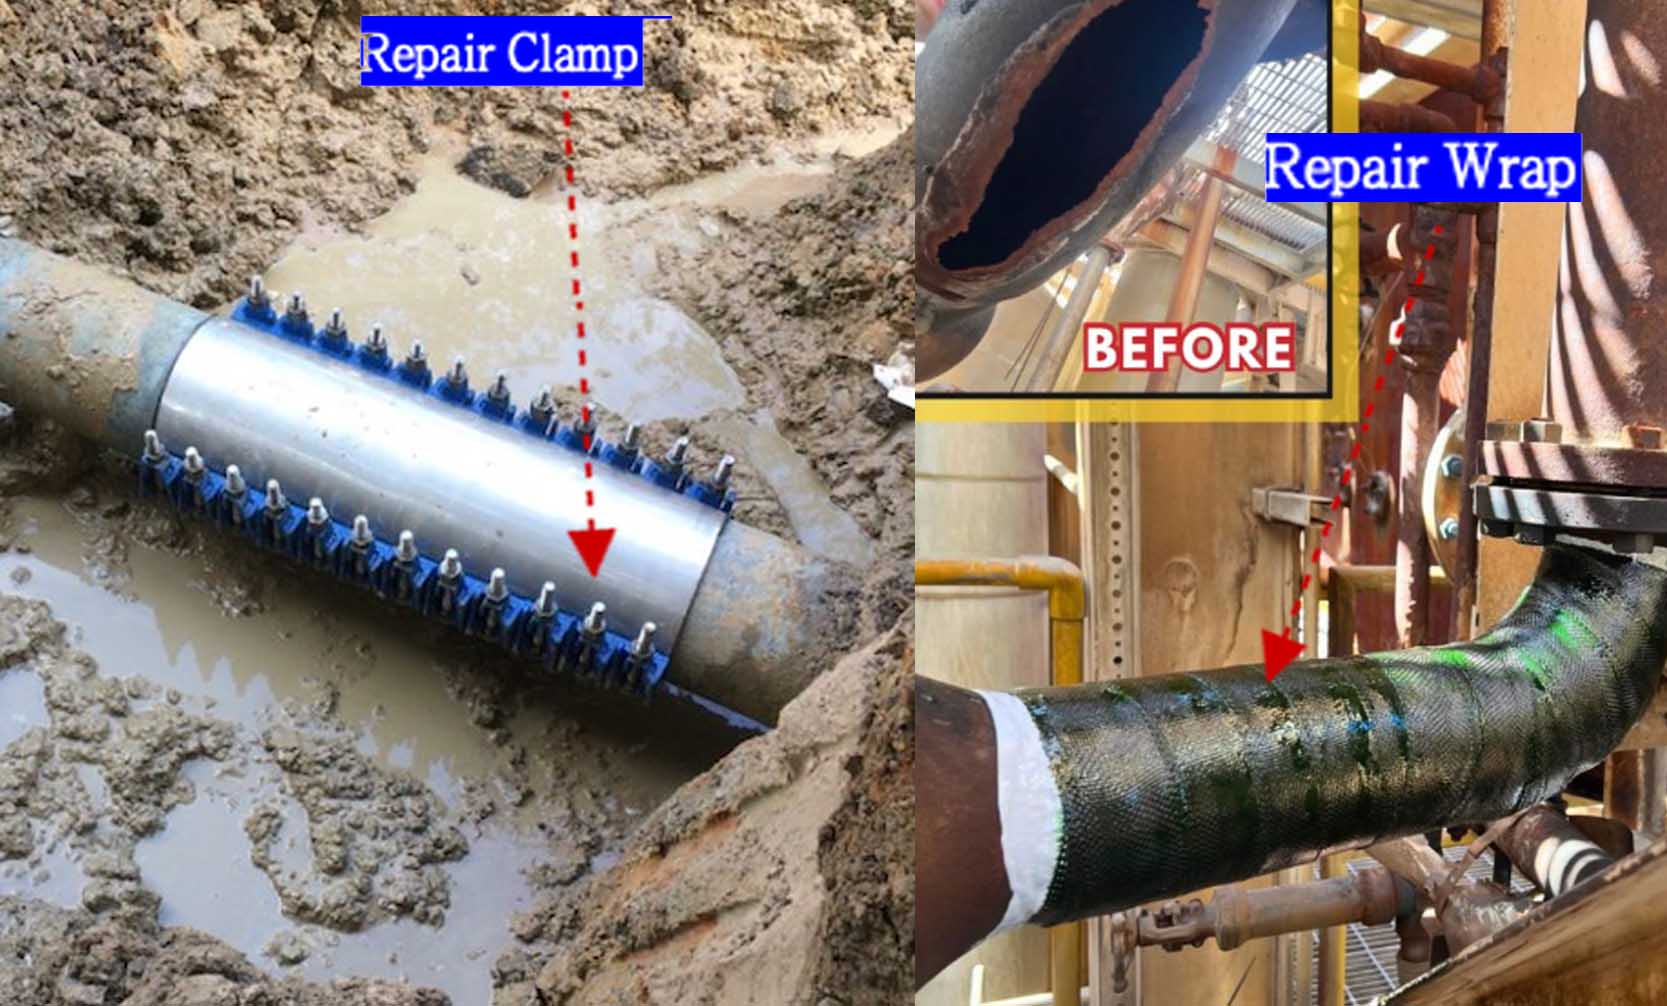
Over the years, our factory has supplied all kinds of solutions, and I can tell you that each method has its place. The choice depends on pressure, pipe condition, and required lifespan. A high-quality repair clamp is my go-to for most situations. It's a mechanical solution that provides a reliable seal and can often outlast the pipe itself. A wrap, which is essentially a resin-impregnated bandage, can be great for sealing leaks on fittings like tees or elbows where a standard clamp won't fit. However, its effectiveness depends heavily on proper application.
Then there's full replacement. If the pipe is severely corroded, has a long crack, or is deformed, don't try to patch it. You are only delaying a bigger failure. Cutting out the damaged section and installing a new piece is the only safe, long-term solution. Here’s a simple comparison to help you decide.
| Method | Installation Time | Durability | Best For |
|---|---|---|---|
| Repair Clamp | Fast (15-30 mins) | Very High (Permanent) | Pinholes, cracks, joint leaks |
| Repair Wrap | Moderate (30-60 mins) | Moderate to High | Awkward shapes, fittings |
| Replacement | Slow (Hours) | Highest (New Pipe) | Severe damage, blowouts |
Step 3: Select the Correct Pipe Repair Clamp Size and Type?
You've decided on a clamp. Great choice. But walking into a supply house is like walking into a candy store—so many options. Grabbing the wrong one is like using the wrong key; it simply won't work.
First, match the clamp type to the leak location. Then, measure the pipe's exact outer diameter (O.D.), not the nominal size. Finally, ensure the clamp is long enough to extend well beyond the damaged area on both sides for a secure seal.
This step is where many repairs fail before they even begin. Getting it right is about precision. In our factory, we build clamps to exact specifications because there is no room for error.
Match Clamp Type to Leak Location
You must use the right tool for the job. A standard clamp won't seal a leaking bell joint. You need a clamp designed specifically for that application.
- Straight Pipe Leaks: Use a standard, full-circumference repair clamp.
- Socket-Spigot Joints: Use a specialized bell joint repair clamp.
- Flange Connections: Use a full-wrap flange repair clamp that encases the entire connection.
- Bends or Tees: Use a clamp specifically fabricated for that fitting's geometry.
Get the Right Size and Structure
Never, ever guess the pipe size or go by the nominal diameter (DN). Always take a physical measurement of the outer diameter (O.D.) with calipers or a pi-tape. Pipe O.D.s can vary. For larger pipes (usually above DN 250), we always recommend using a double-band or multi-section clamp. This design helps distribute the clamping pressure more evenly, which is critical for achieving a seal on a large surface area.
Choose the Correct Length
The clamp must completely cover the damage with plenty of room to spare.
- For pipe O.D. ≤ 300 mm, the clamp should extend at least 80 mm past the leak on each side.
- For pipe O.D. > 300 mm, the clamp should extend at least 100 mm past the leak on each side.
This extra length ensures the rubber gasket has a clean, solid pipe surface to seal against, far away from the damaged area.
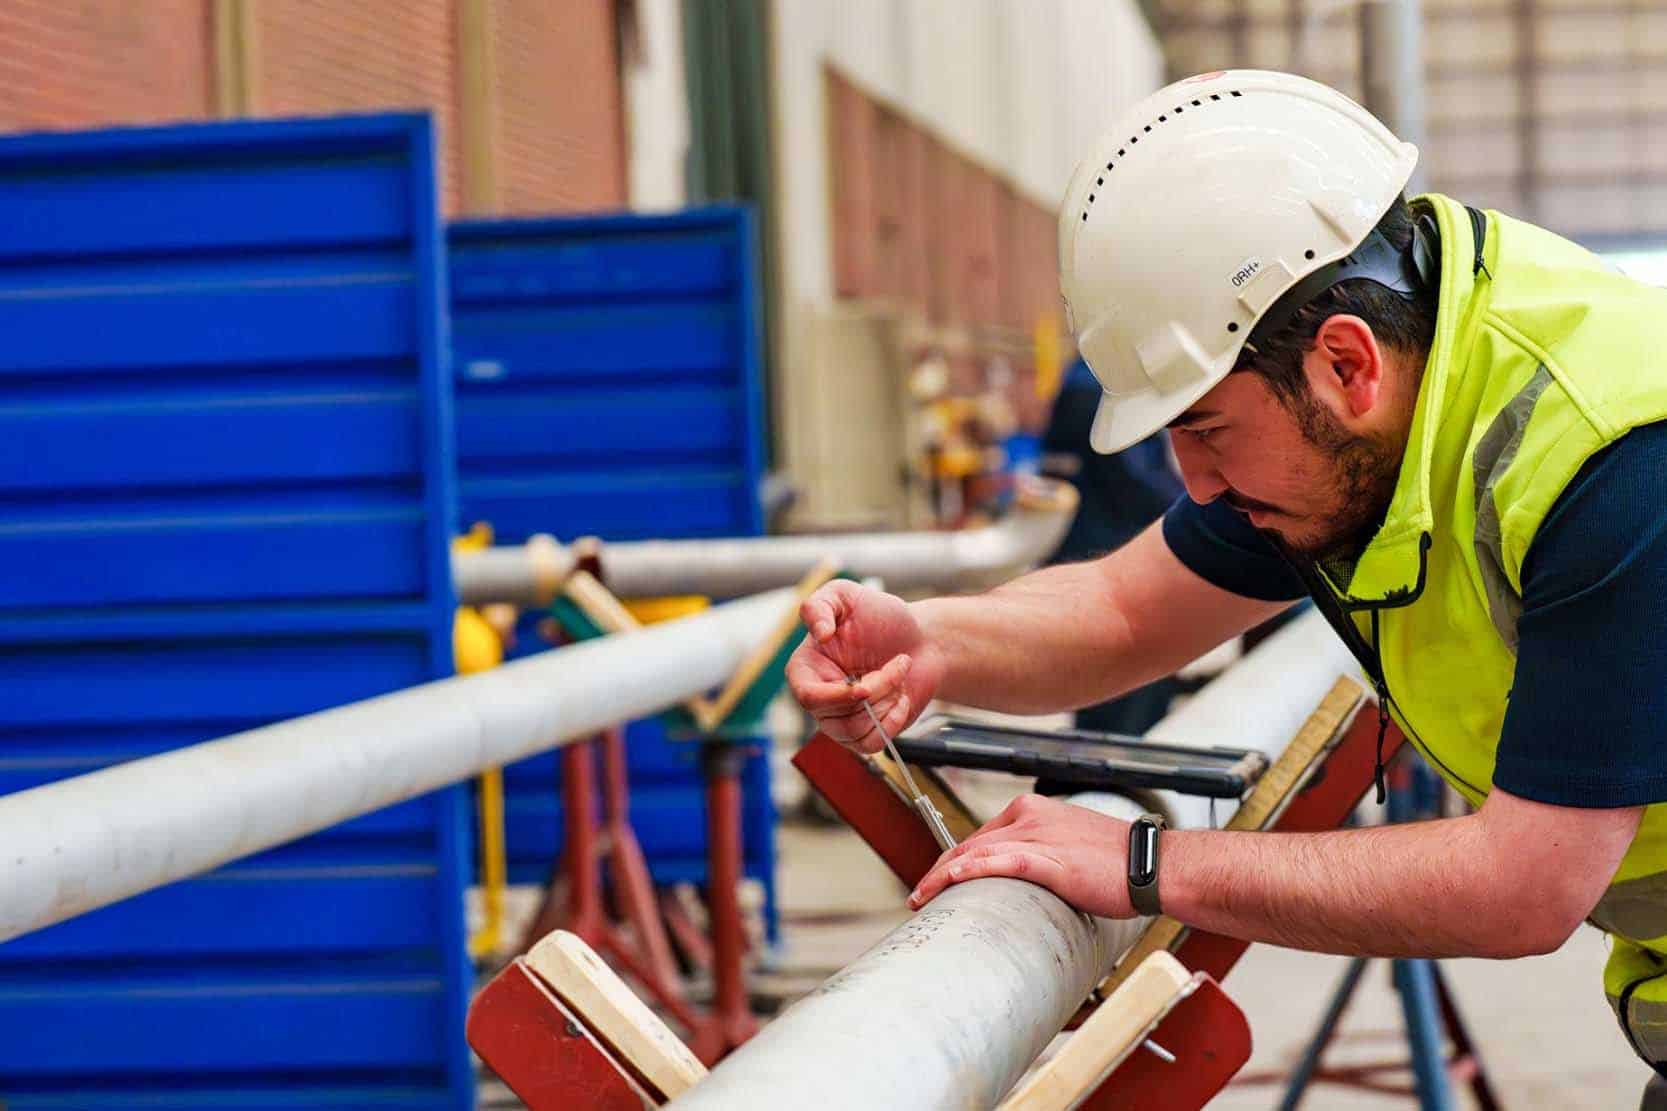
Step 4: Prepare the Pipe Surface Before Installation?
You have the perfect clamp. But the pipe is covered in rust, dirt, and old paint. If you put that clamp on now, it’s guaranteed to leak. It’s a frustrating and completely avoidable mistake.
You must clean the pipe surface around the leak thoroughly. Use a wire brush or grinder to remove all rust, scale, dirt, and loose coatings. The surface must be clean, smooth, and dry for the rubber gasket to create a perfect seal.
Think of the rubber gasket on the clamp. It needs a smooth, clean surface to press against to create a watertight seal. Any bump, piece of dirt, or flake of rust can create a tiny channel for water to escape. This is why surface preparation is not a step to be rushed. I tell my clients that the 10 minutes you spend on prep will save you hours of headaches later.
First, scrape off any heavy mud or debris. Then, get to work with a wire brush (either by hand or on a power tool). Your goal is to get down to the bare, solid pipe material. The surface should be smooth to the touch. If the pipe is pitted from corrosion, you need to grind down the high spots to create as uniform a surface as possible. After you're done with the abrasive work, wipe the entire area down with a clean, dry rag to remove any remaining dust or grit. A clean surface is the foundation of a successful, leak-free repair.
Step 5: Install the Repair Clamp Without Stopping Flow (Step-by-Step)?
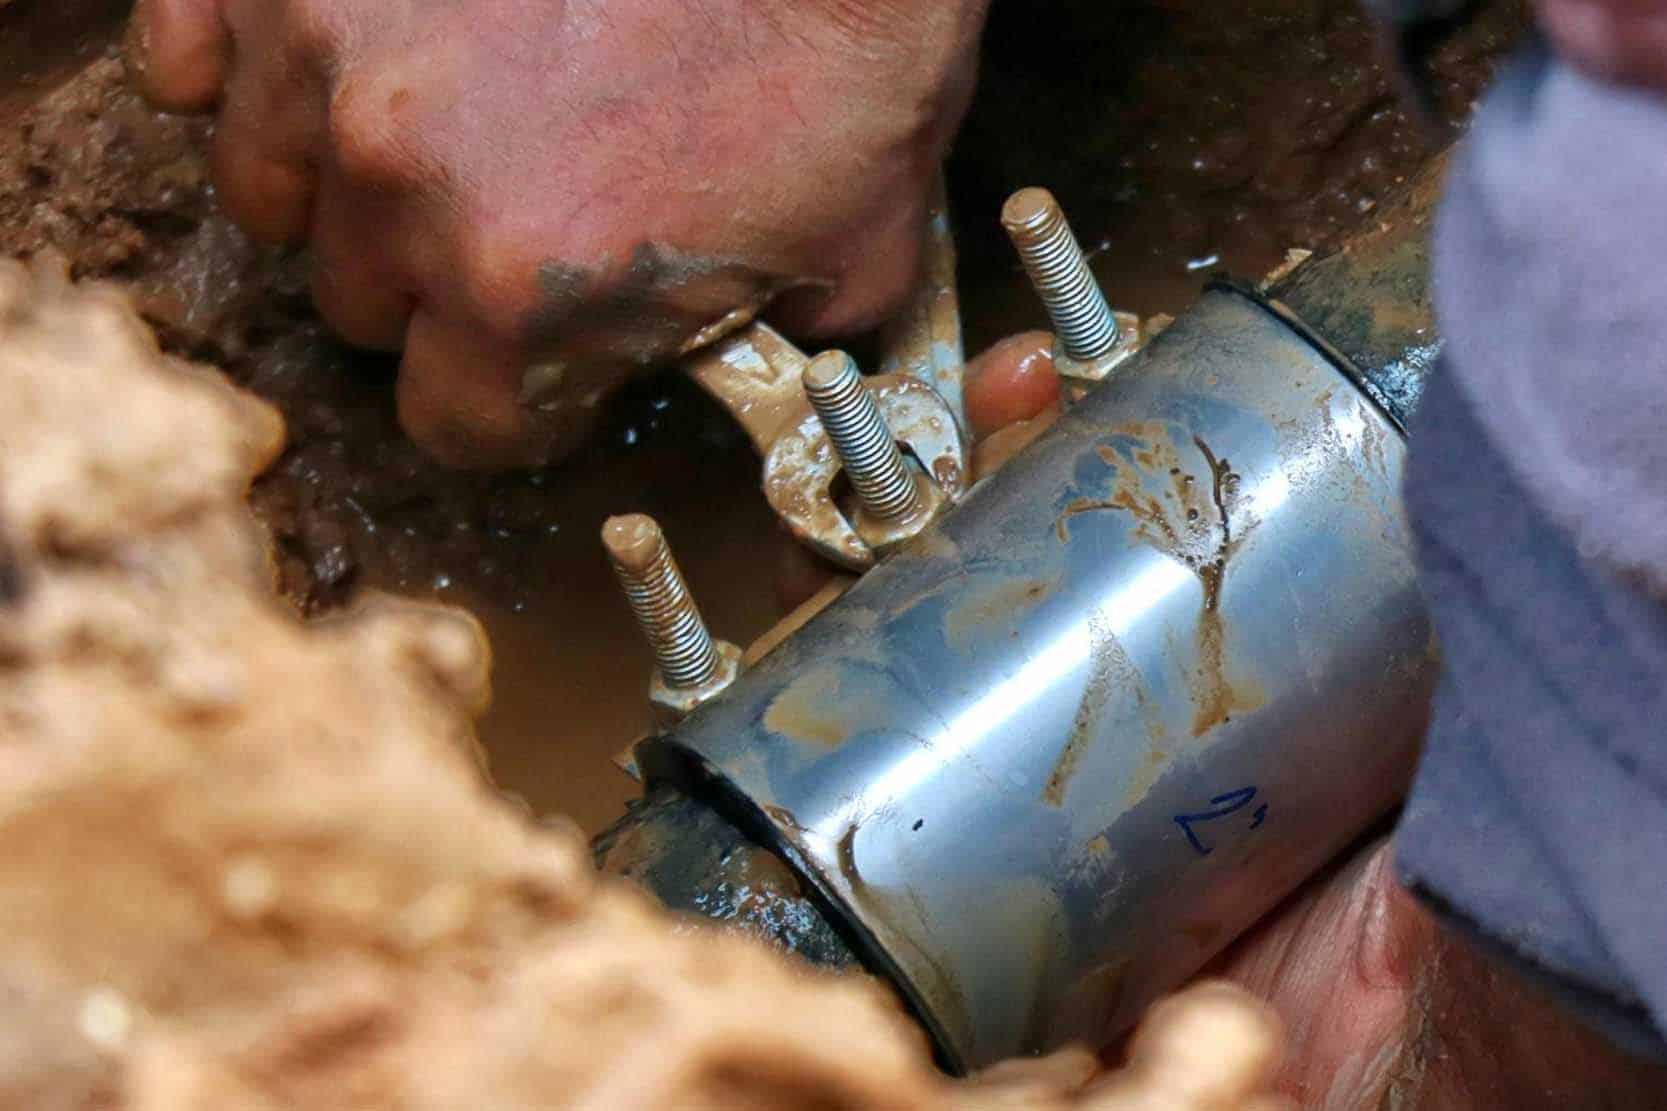
The pipe is prepped, and you have the right clamp. Now it's time for the critical moment of installation on a live, pressurized pipe. This can feel intimidating, but a calm, methodical approach is all you need.
Carefully open the repair clamp and place it around the pipe, making sure the gasket is centered directly over the leak. Bring the clamp halves together, insert the bolts, and hand-tighten the nuts to hold it in place before final torquing.
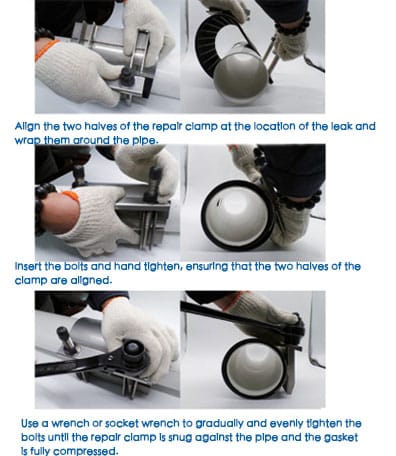
This is the part of the job that requires focus. Water may still be spraying or dripping, so be prepared to get a little wet. Safety first: always wear your eye protection and gloves.
Positioning the Clamp
Most repair clamps come in one or two pieces. Open the clamp up. Before you wrap it around the pipe, take a moment to lubricate the gasket with a suitable, water-safe lubricant. This helps it slide into place without getting pinched or torn. Carefully position the clamp so that the leak is in the very center of the rubber gasket. If the clamp is off-center, one edge of the leak might not be properly sealed.
Assembling the Hardware
With the clamp in position, bring the two halves (or the single opening) together. The bolt lugs should line up perfectly. Don't force them. If they don't align, the clamp might be the wrong size or not seated correctly on the pipe. Once aligned, insert the bolts and thread on the nuts.
Initial Tightening
Using your fingers or a small wrench, tighten all the nuts until they are snug. The goal here is not to stop the leak yet, but to draw the clamp pieces together evenly and hold the clamp securely in place. This ensures it doesn't shift during the final, critical torquing stage.
Step 6: Tightening Sequence and Torque Tips to Prevent Leakage?
The clamp is on the pipe, but the job isn't done. How you tighten the bolts is just as important as the clamp itself. Uneven tightening is the number one reason a high-quality clamp fails to seal.
Always tighten the bolts evenly in multiple passes, starting from the center and then moving to both sides. Use a calibrated torque wrench to tighten each bolt to the manufacturer's specified value. Do not guess and do not overtighten, as this can damage the clamp or the pipe.
If the repair clamp has more than three bolts, first tighten the middle bolt, then tighten the bolts adjacent to it, and continue tightening the remaining bolts in sequence next to the already tightened ones. You should tighten all bolts gradually in multiple passes, applying even force in this order.Once the leak has stopped, switch to a torque wrench. This is the only tool that can ensure you apply the correct amount of force. Overtightening can crush a PVC pipe or damage the bolt lugs on the clamp. Under-tightening will result in a leak. The manufacturer provides torque specifications for a reason—use them.
| Bolt Size | Example Recommended Torque |
|---|---|
| M12 | 50-60 Nm (37-44 ft-lbs) |
| M16 | 80-100 Nm (59-74 ft-lbs) |
| M20 | 120-150 Nm (88-110 ft-lbs) |
Note: Always consult the specific manufacturer's installation guide for exact torque values.
Common Mistakes That Cause Repair Failure?
You followed the steps, but a few days later, you get a call: the pipe is leaking again. It's frustrating and costly. This happens when small, seemingly minor details are overlooked during the repair.
The most common mistakes are choosing the wrong clamp size based on a guess, failing to prepare the pipe surface properly, and uneven bolt tightening. Rushing the job and misdiagnosing the pipe's overall condition are also major causes of failure.
After three decades of manufacturing these products and troubleshooting installations with customers, I've seen a few common themes that lead to failure. The good news is that they are all completely avoidable if you are diligent and methodical in your work.
Here are the top mistakes I see in the field:
- Guessing the Pipe O.D.: This is the original sin of pipe repair. A clamp that is too big will never seal. A clamp that is too small won't fit. Solution: Always measure the exact Outer Diameter with calipers before ordering.
- Dirty Pipe Surface: Putting a clamp over rust and dirt is like putting a bandage over a muddy wound. It won't stick. Solution: Clean the pipe down to the bare, solid material. No exceptions.
- Uneven Tightening: This creates high and low pressure spots under the gasket, allowing water to find an escape path. Solution: Use a torque wrench and a crisscross tightening pattern.
- Clamp is Off-Center: If the edge of the crack or pinhole is too close to the edge of the gasket, the seal will be weak. Solution: Carefully mark the leak and ensure it is centered under the gasket before you start tightening.
When a Repair Clamp Is Not Enough (High Pressure or Pipe Movement)?
You see a leak and your first instinct is to grab a clamp. But a repair clamp is not a magic bullet. Using one in the wrong situation can be ineffective and, in some cases, dangerous.
A standard repair clamp cannot fix major structural damage, contain high-pressure blowouts, or restrain a pipe that is moving. In these scenarios, a full pipe section replacement is the only safe and permanent solution to restore the line's integrity.
A repair clamp is designed to do one thing very well: seal a leak on a structurally sound pipe. It is not designed to hold a pipe together. It's critical to recognize the limitations.
High-Pressure Systems
If a leak is the result of pressure far exceeding the pipe's design limits, a clamp is only a temporary patch on a systemic problem. The pipe itself is at risk of a catastrophic failure, and a clamp will not prevent that. The system pressure needs to be addressed first.
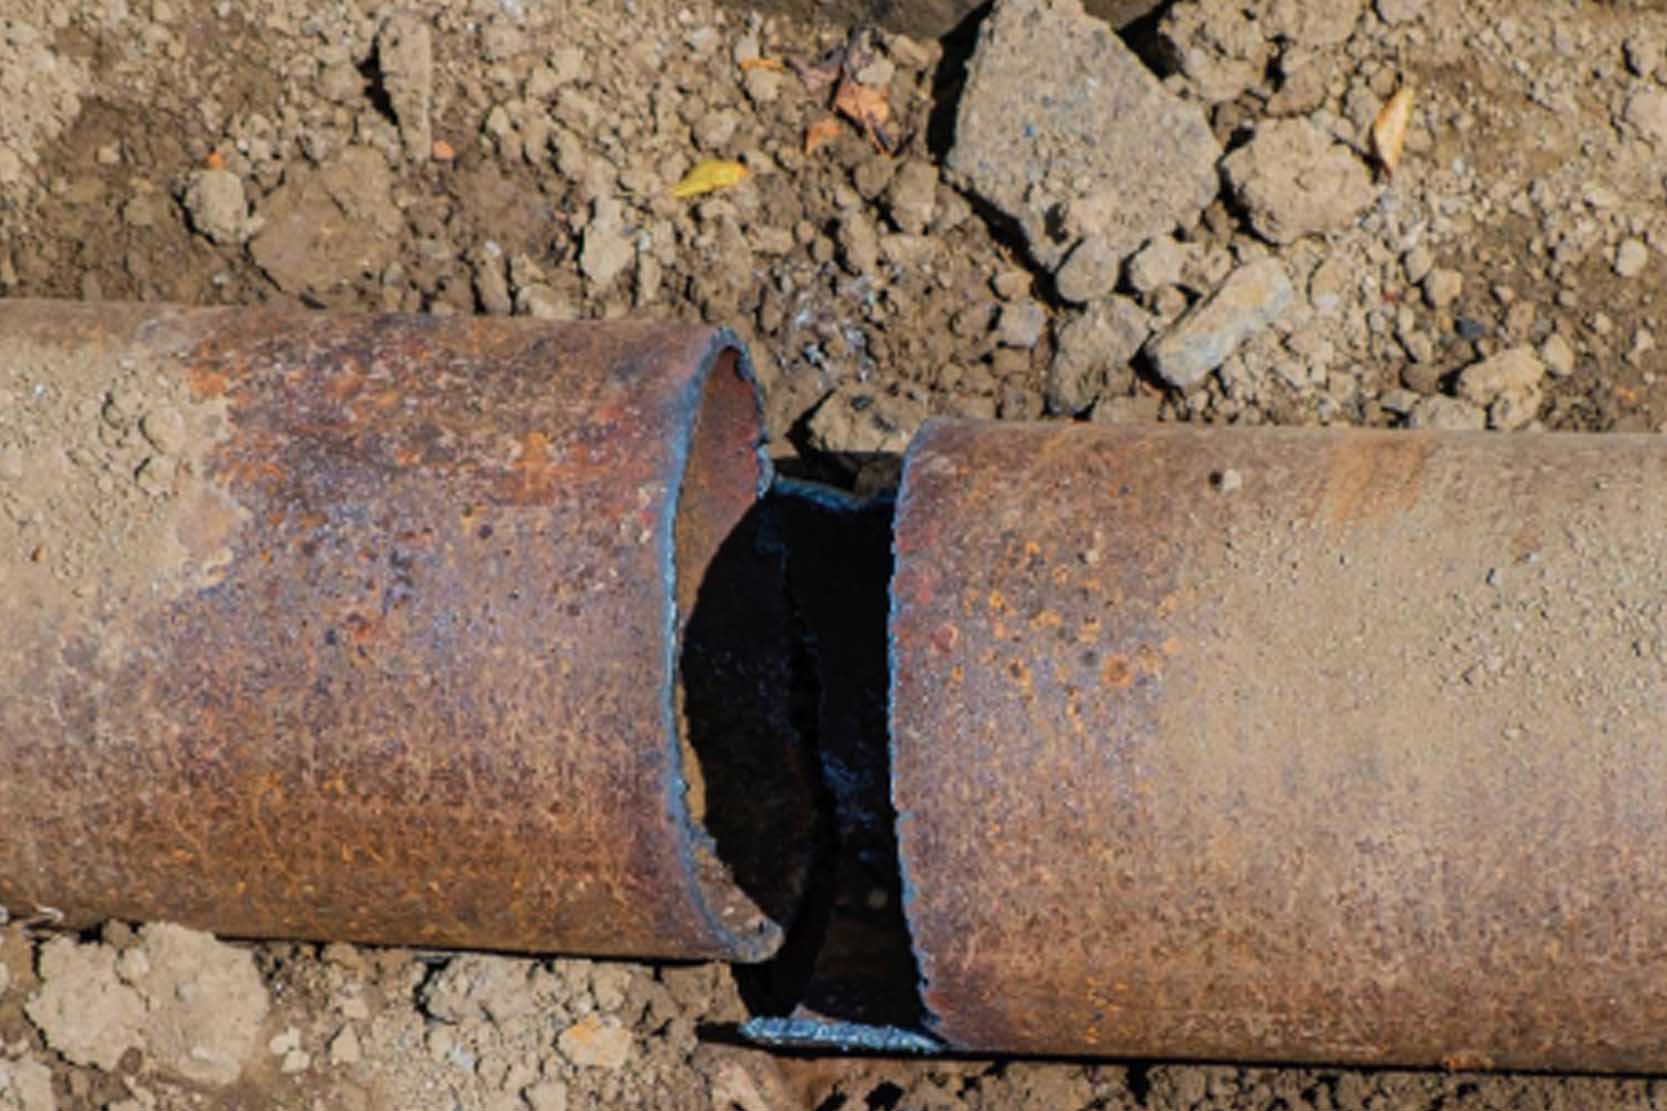
Severe Pipe Damage
If you see a long crack that runs down the length of the pipe, or if the pipe wall is so corroded that it feels soft or spongy, do not use a clamp. The clamp's pressure could cause the damaged section to collapse completely. The structural integrity is gone, and that section must be cut out and replaced.
Pipe Movement
Pipes move due to thermal expansion, ground settlement, or water hammer. A repair clamp seals a hole; it does not lock the pipe in place. If the pipe is pulling apart at a joint, a standard repair clamp will not stop it. You need a solution with axial restraint, such as a restrained coupling or a full replacement with restrained joints.
Final Checklist: Ensure a Safe and Long-Term Leak Repair?
The leak is stopped, and the tools are packed away. But are you truly finished? A moment of final verification can be the difference between a permanent repair and a costly callback next week.
Before leaving the site, run through a final checklist. Double-check that all bolts are torqued to specification. Visually inspect the entire clamp for any signs of weeping. Finally, document the repair and schedule a follow-up inspection.

Over the years, I've learned that a good process is the key to consistent quality. A final checklist ensures that no detail, no matter how small, is forgotten in the rush to complete a job. It's a simple habit that builds trust with your clients and prevents unnecessary rework. Before you consider the job done, ask yourself these questions:
- [ ] Is the leak 100% stopped? Watch it for at least five minutes.
- [ ] Was the correct clamp type used for the application (straight, joint, etc.)?
- [ ] Was the pipe O.D. measured accurately and is the clamp the correct size?
- [ ] Was the pipe surface properly cleaned and prepared?
- [ ] Were all bolts tightened in the correct sequence?
- [ ] Was a calibrated torque wrench used to apply the correct final torque?
- [ ] Is the repair location and date documented for future maintenance records?
- [ ] Is a follow-up inspection scheduled for 24 hours or one week later?
Taking these final steps shows a level of professionalism that sets you apart. It demonstrates that you are not just providing a quick fix, but a reliable, long-term solution.
Conclusion
Repairing a pipe without a shutdown is very possible with the right clamp and process. Success depends on careful inspection, proper surface preparation, and precise installation. A lasting fix is in the details.
