Restrained Coupling Adaptor for HDPE Pipe Sr No. JC008 Installation Instruction
Precautions
Please note before installing Restrained Coupling for HDPE Pipe Sr No. JC009, in addition to following the steps below step by step, the following technical parameters should be strictly conform to. Failure to meet any of them will result in failure of the installation.
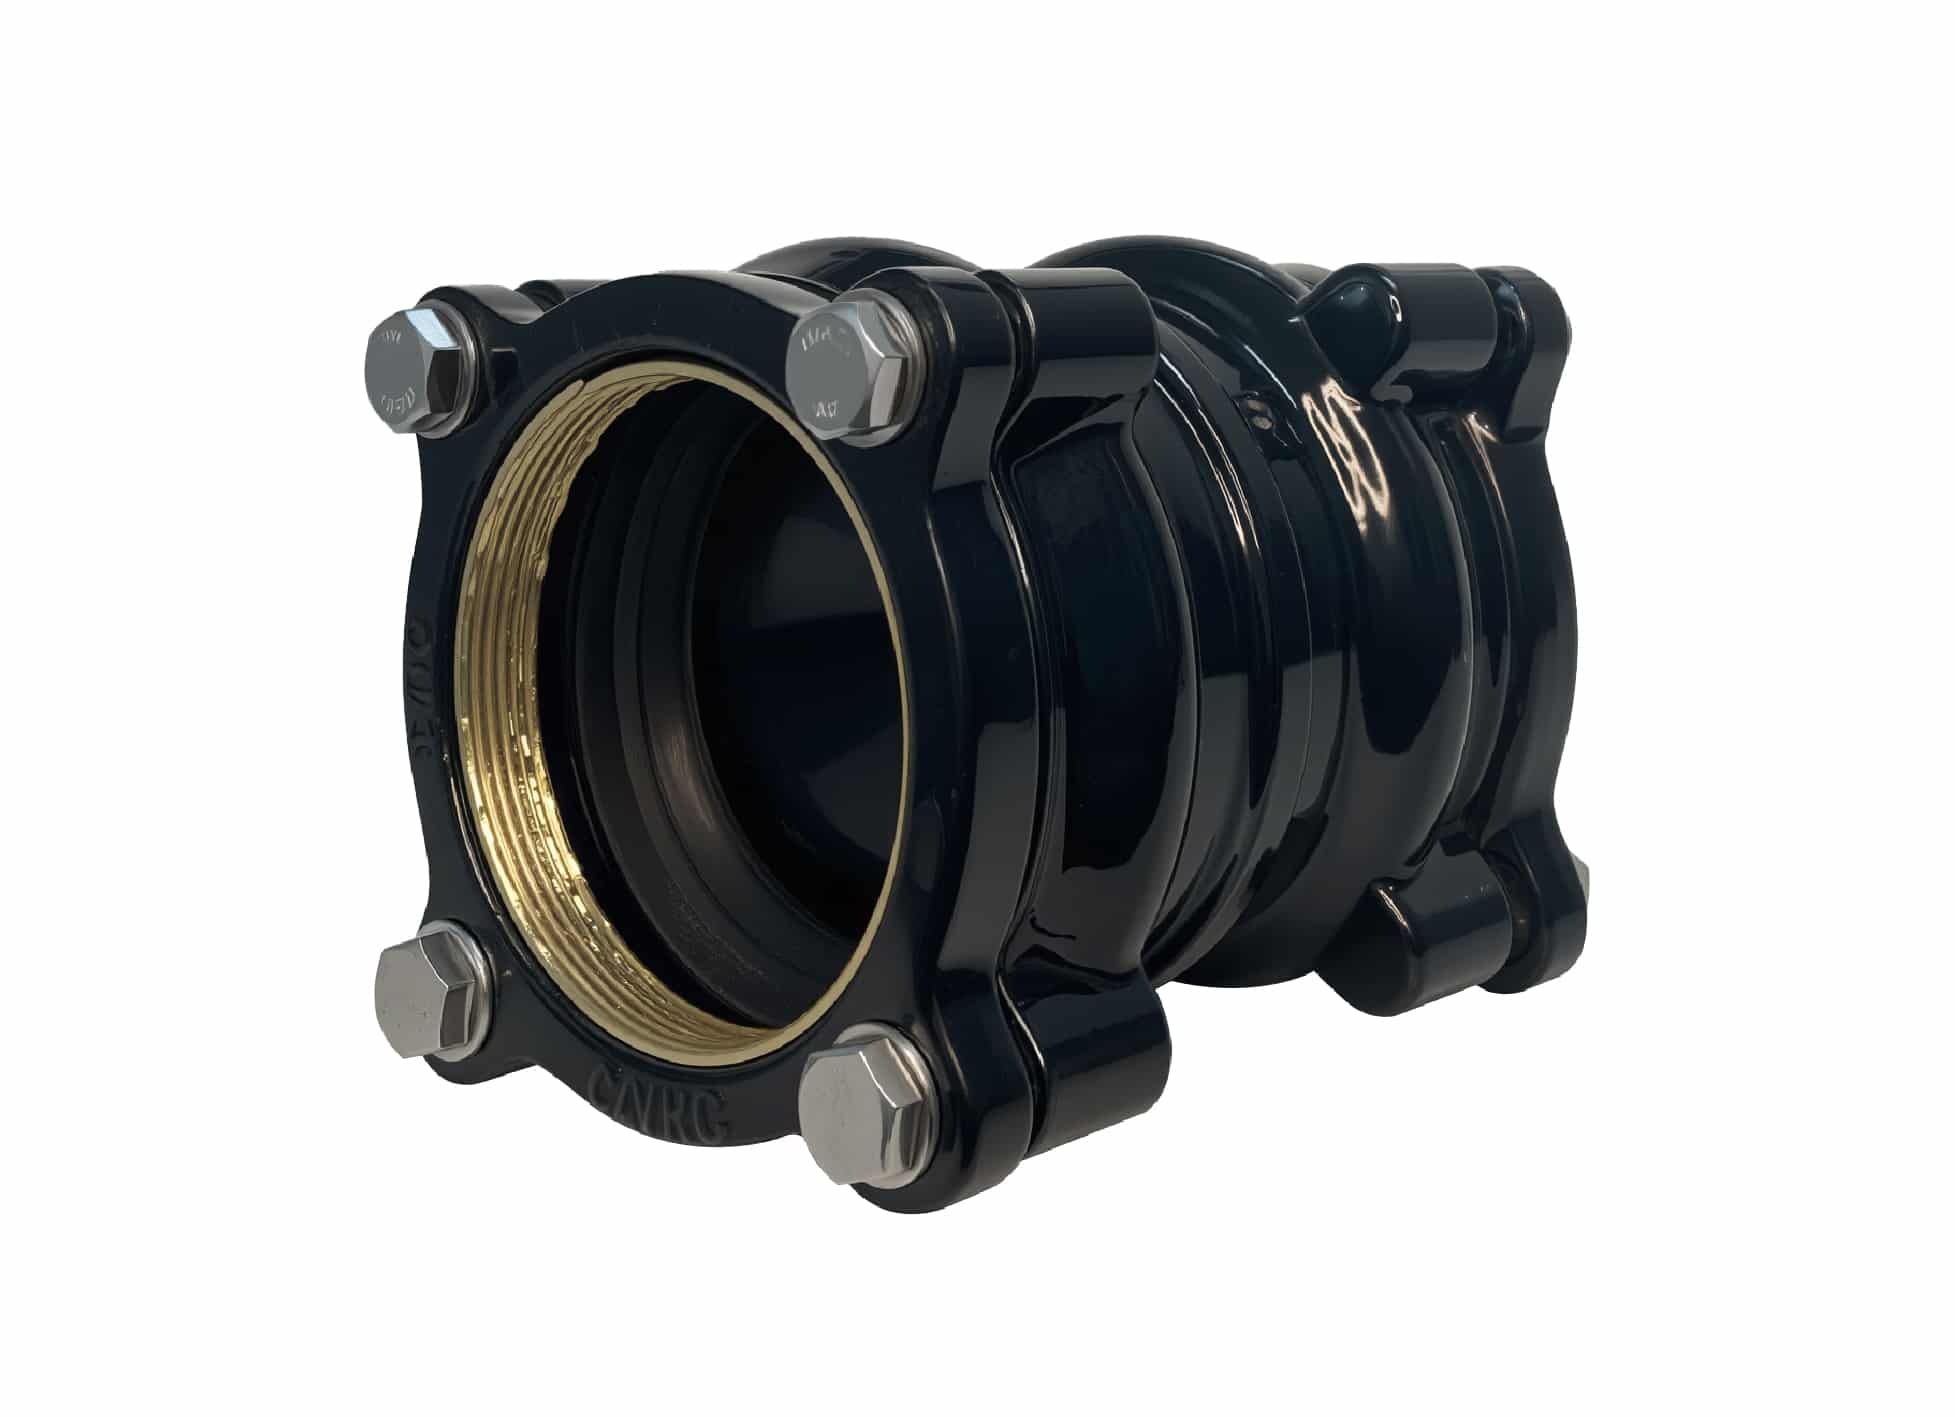
Prior to installation, check that all parts are intact and undamaged, and that surfaces are free of debris and clean. grip rings(as below No. 4) and sealing gaskets(as below No.3) must be in perfect condition, and the presence of any defects or debris is not permitted. Also make sure that the threads on the bolts and restrained coupling body(as below No.1) fit properly and are free of debris.
Step 1
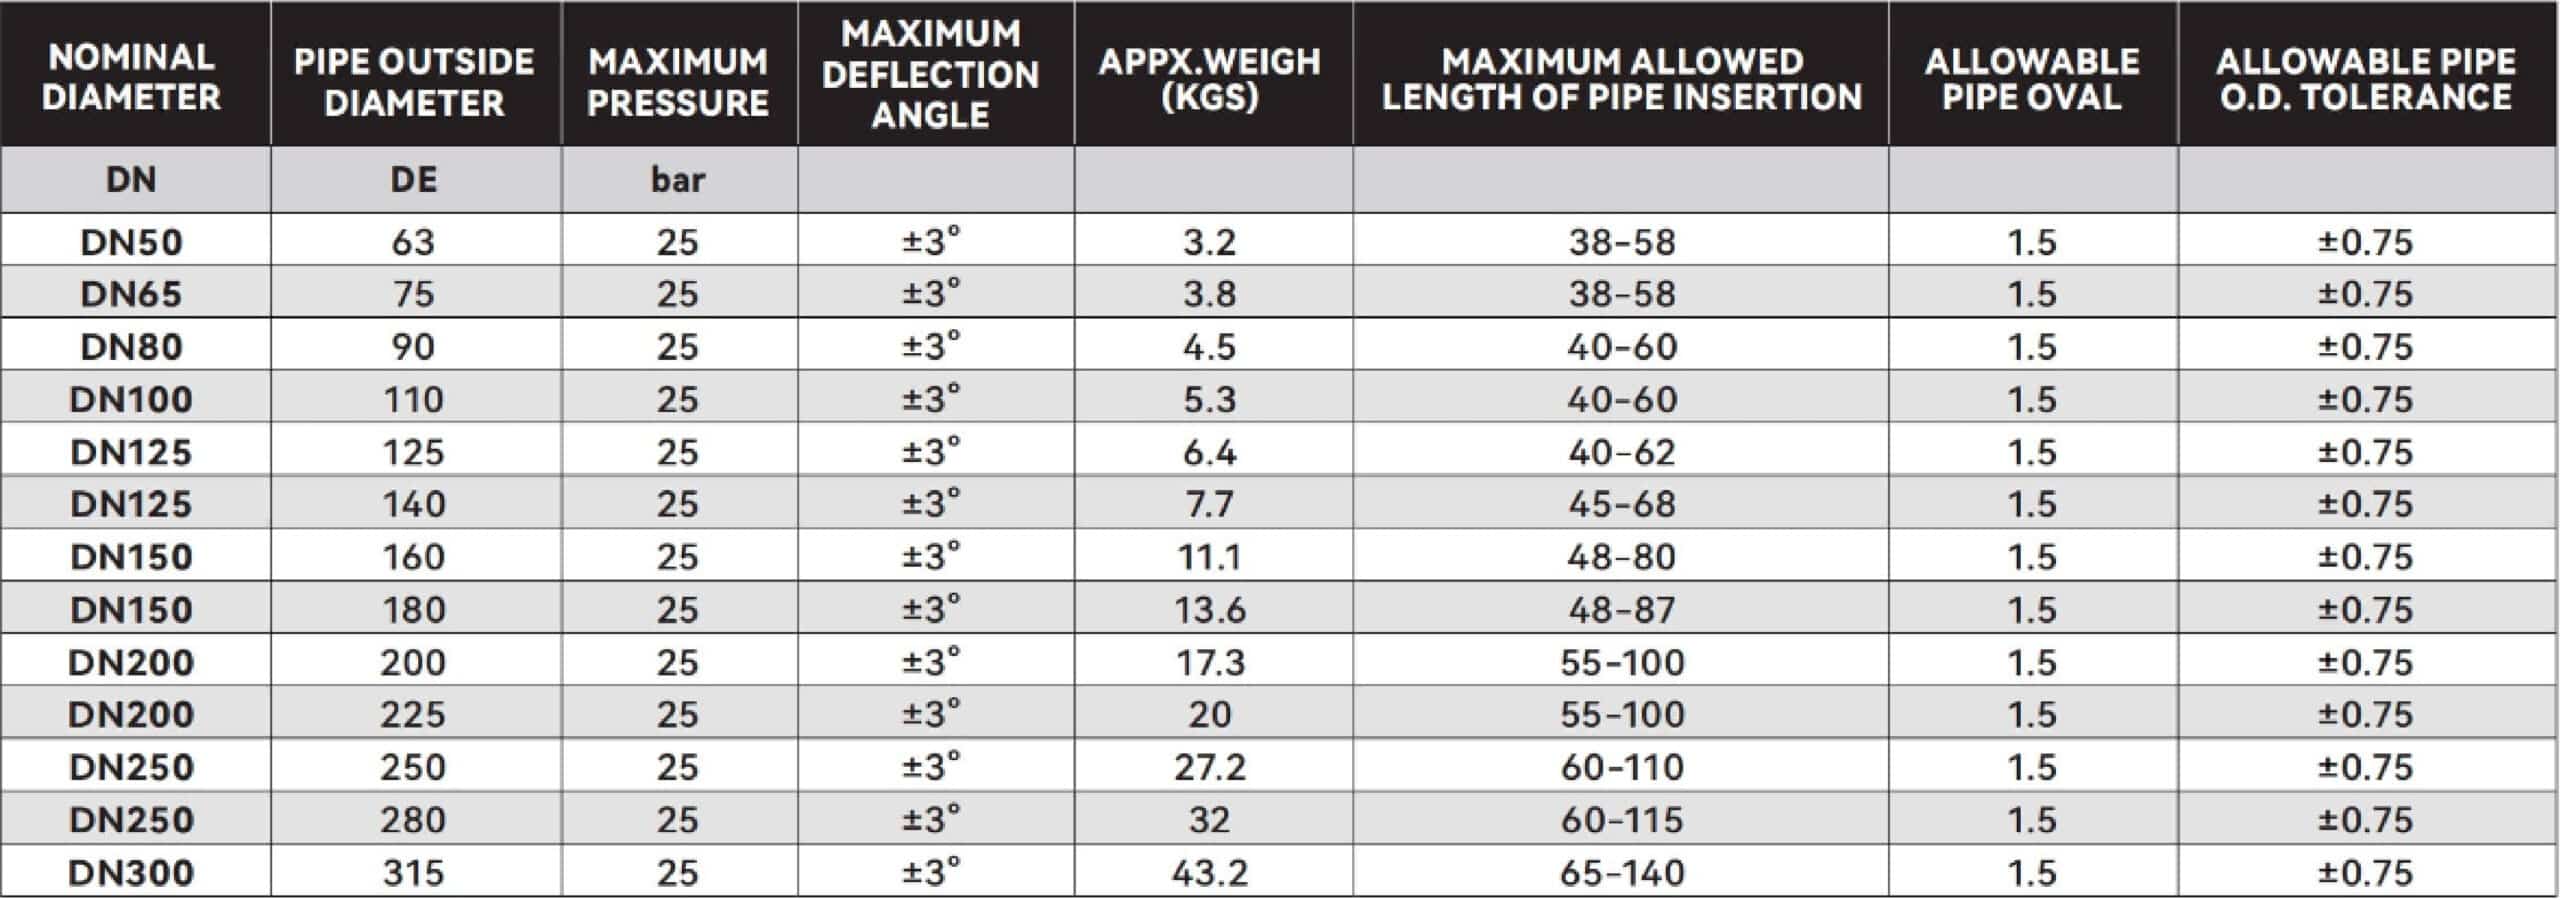
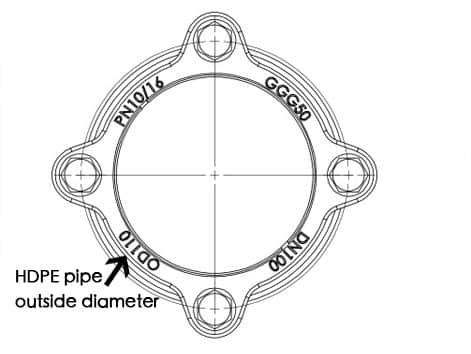
According to the outer diameter of the HDPE pipe to be connected to select the appropriate restrained coupling, Judberd restrained coupling will be clearly marked the applicable HDPE pipe OD on the end rings , please pay attention to the design standards of HDPE pipe, different design standards of HDPE pipe OD is different, carefully check the pipe OD ,it should be consistent with the OD size which is marked on the end rings of the restrained coupling . The permitted tolerance of pipe OD is ±0.75mm.
Step 2
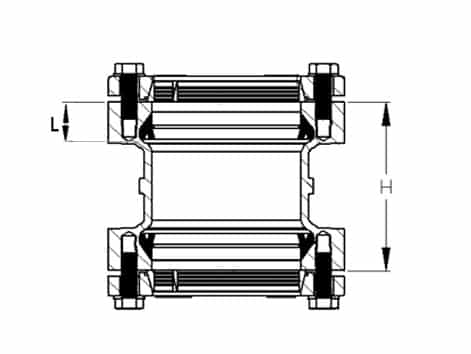
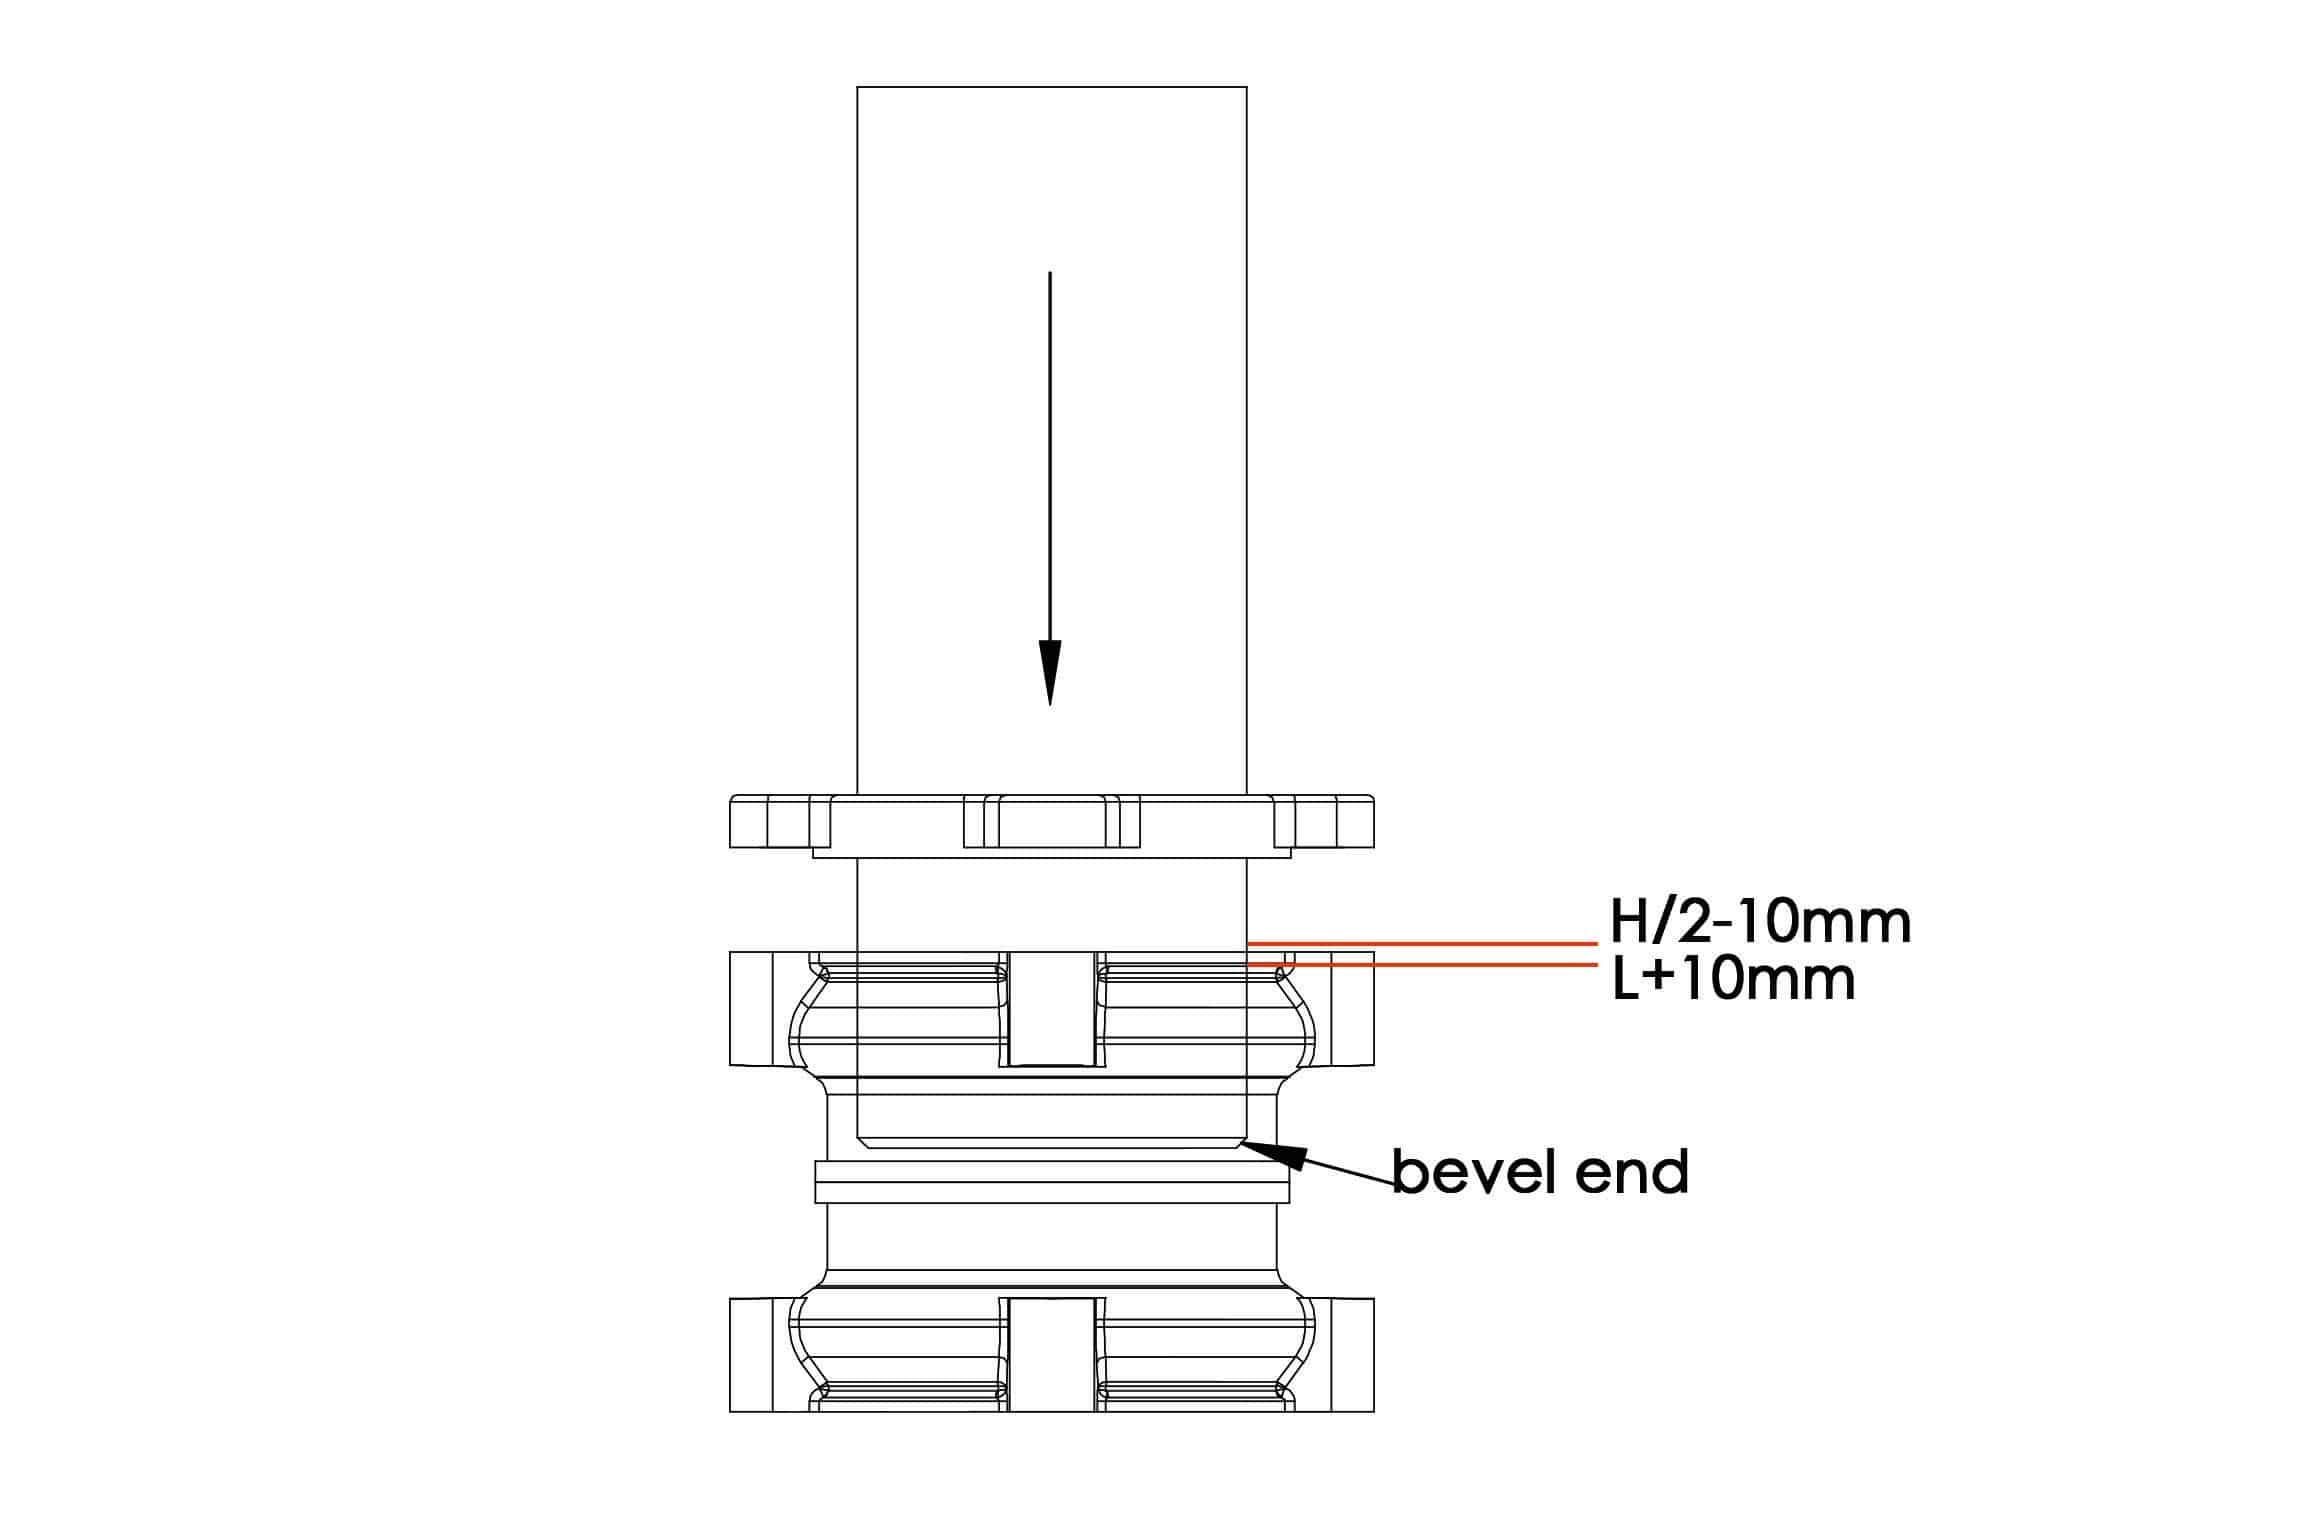
Disassemble the restrained coupling and measure the middle sleeve height H (as below diagram) and the distance L (as below diagram) from the outside surface of the middle sleeve to the bottom surface of the sealing rubber ring.
Step 3
Chamfer the end of each of the two HDPE pipes to be connected (chamfering makes it easier to insert through the sealing gasket ring), please note professional chamfering tool as below should be used to assure good performance bevel end, and clean the outer surface of the pipe. Mark the H/2-10mm line and the L+10mm line from the bevel end of the pipe on the outside surface of the pipe.
Insert pipe stiffener to avoid pipe deformation .

Professional Chamfering Tool

PIPE STIFFENERS
Step 4
Let the pipe go through the end ring with the bevel ends ahead, insert the pipe into middle sleeve of restrained coupling as below diagram and let the pipe go through the sealing rubber ring, adjust the depth of insertion so that the L+10mm line is inside the middle sleeve of restrained coupling and the H/2-10mm line is outside the middle sleeve of restrained coupling as below diagram.
Step 5
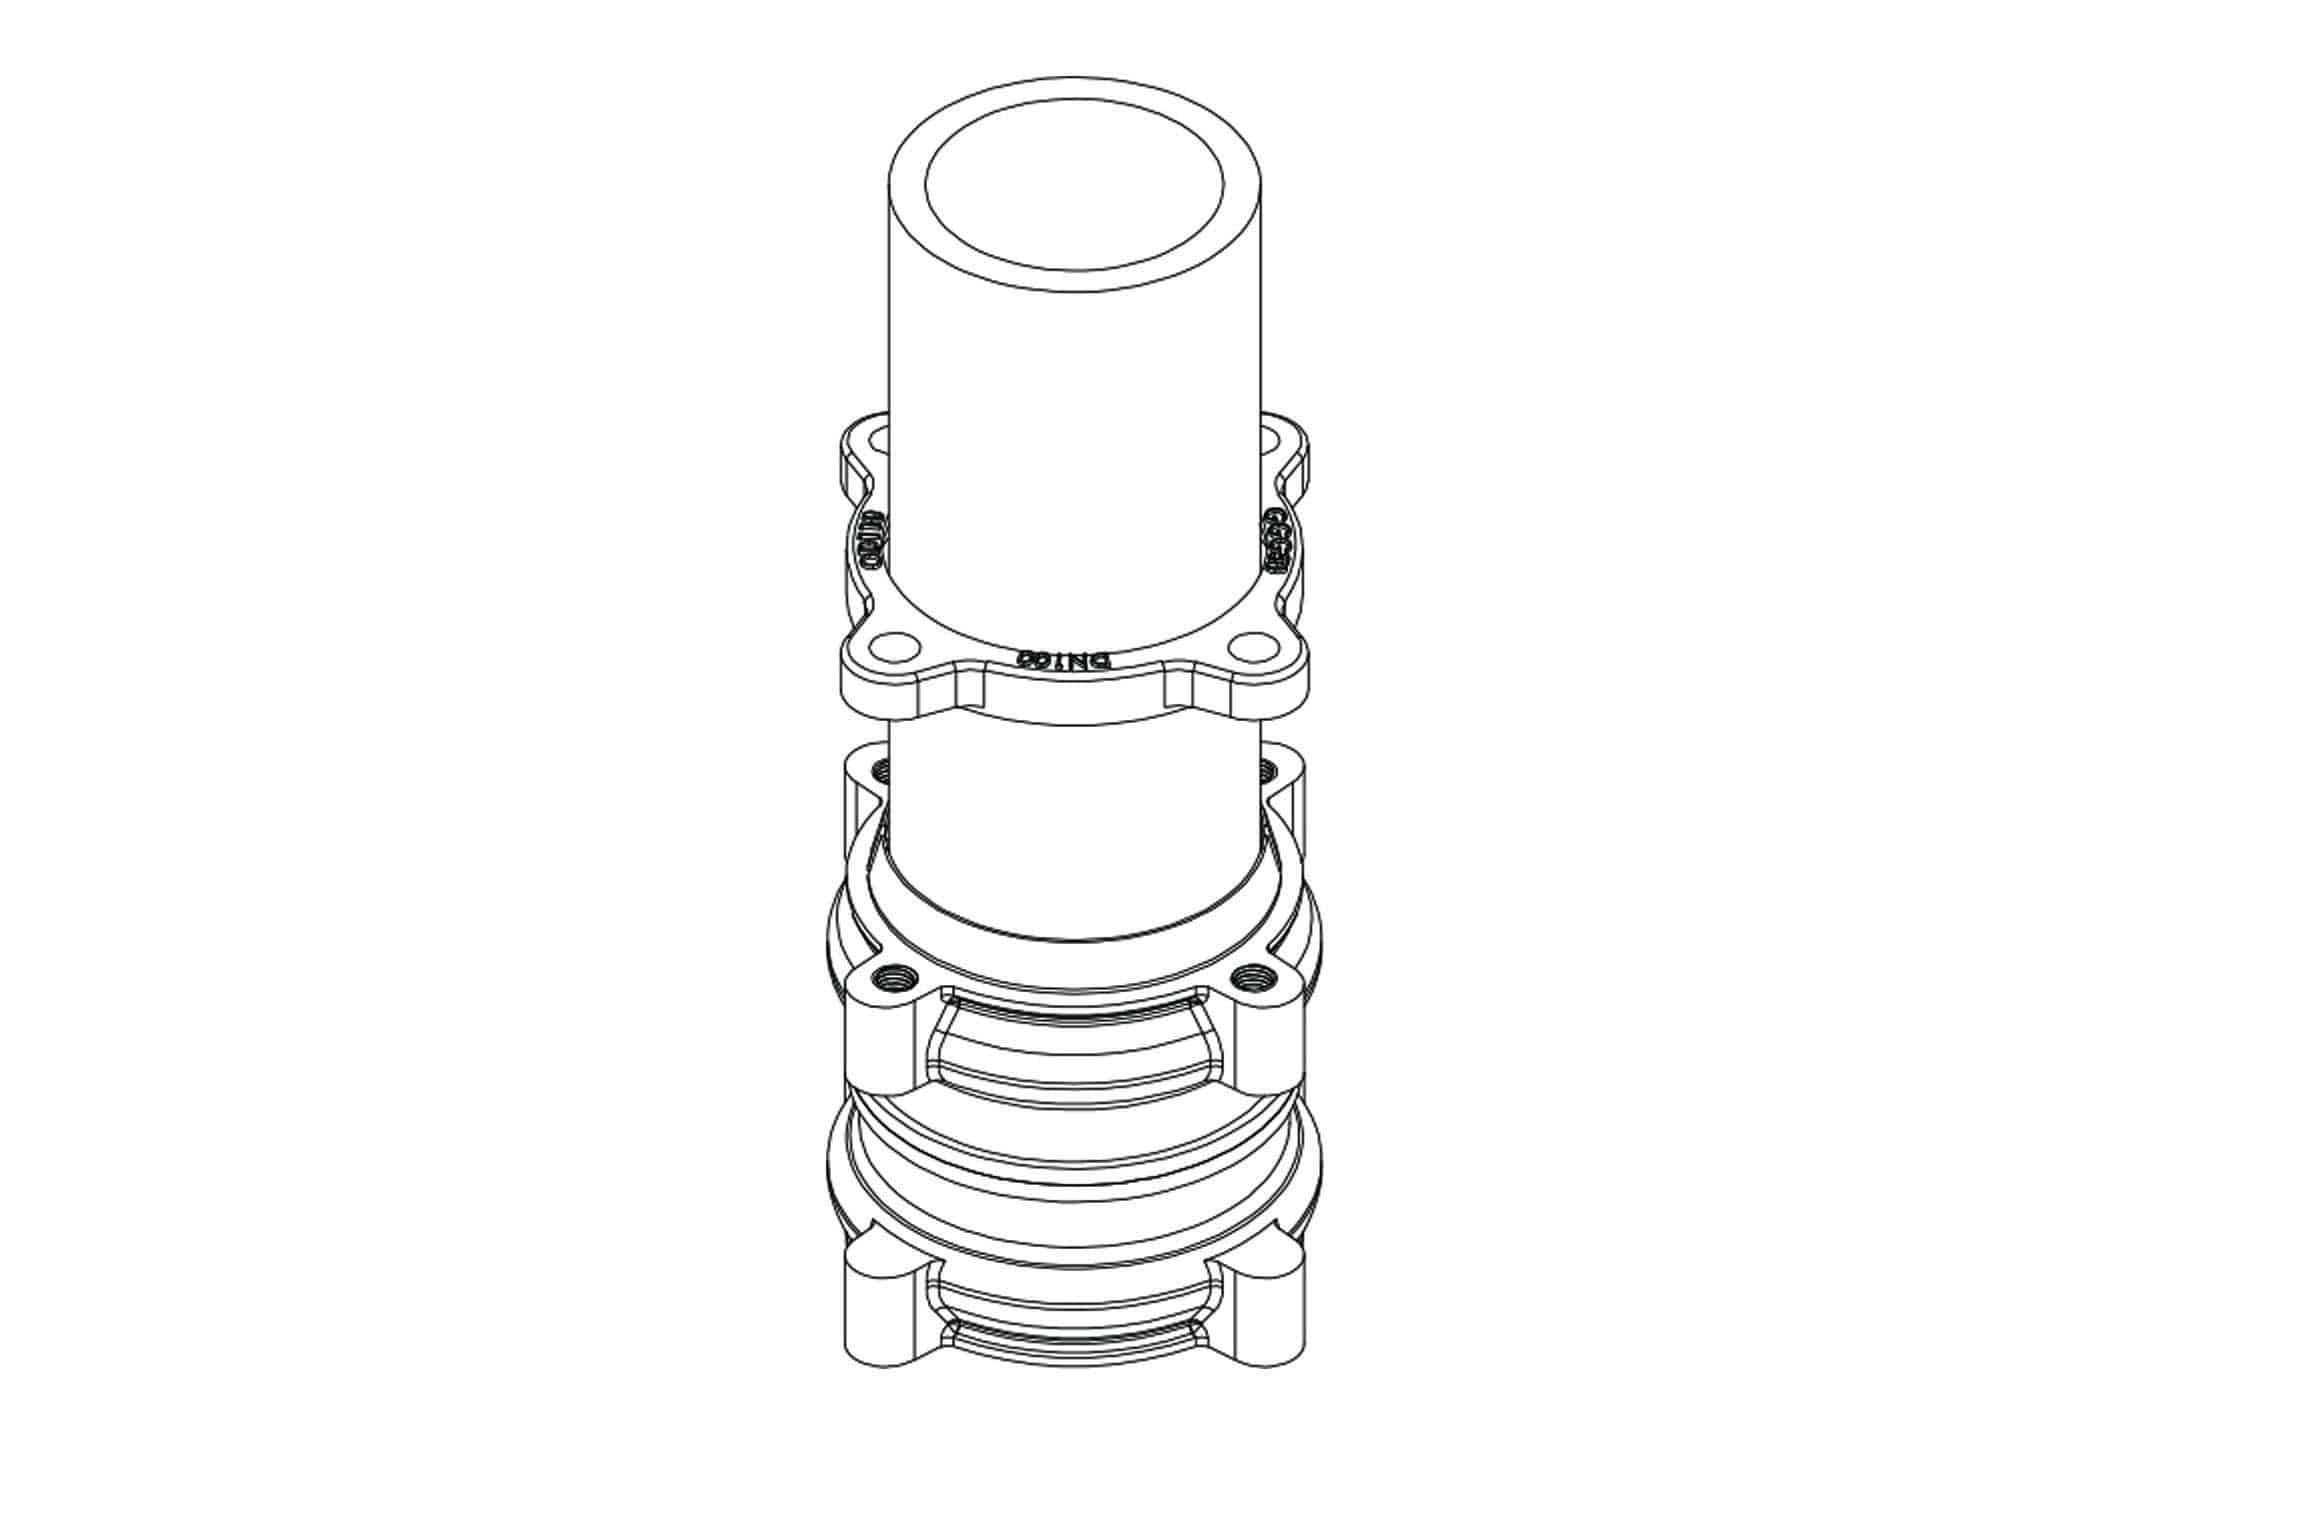
Let the pipe go through the grip ring and end ring, push the end ring toward the grip ring and middle sleeve, rotate the direction of the gland, so that the bolt holes in the gland and the bolt holes in the middle sleeve are aligned, screw on the bolts, adjusted evenly, and then use a torque wrench in accordance with the direction of the diagonal in turn, even force, and tighten it several times up to 25 Nm.
Step 6
Assemble another HDPE pipe according to above step 4 and step 5.
Step 7
Slowly pressurize and observe whether the HDPE pipe is outwardly dislodged, if it is outwardly dislodged, then use the torque wrench to increase the torque to 30 Nm and then pass the pressure to observe.
If the sealing fails, please follow all the steps above to check in order to find out the problem.


