Many users do not follow the correct methods when installing pipelines, which results in improper pipe connections and water leaks. This article will guide you step by step on how to properly connect a mechanical coupling, starting from the selection of the mechanical coupling.
Please note that the mechanical coupling discussed in this article refers to the restrained mechanical coupling with a locking wedge. It is suitable for most common pipes on the market, such as ductile iron pipes, PE pipes, PVC pipes, and steel pipes. However, it is not suitable for GRP pipes because GRP pipes are relatively smooth and difficult to lock securely. Moreover, GRP pipes have lower strength and are prone to damage.
Step 1
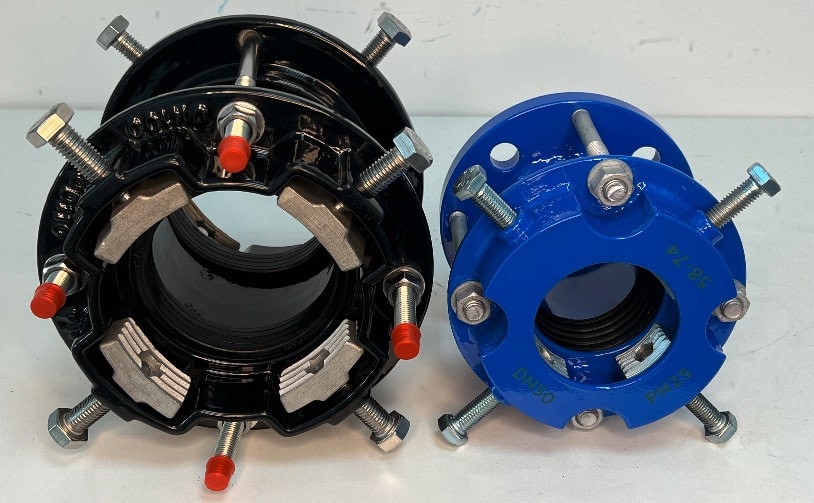
Select an appropriate mechanical coupling according to the outer diameter of the pipe and the working pressure of the pipeline. Ensure that the mechanical coupling has no damage or missing components. Clean the surface of the pipes thoroughly to make sure there is no damage and that the surface is clean and intact. The ovality should be within the permissible tolerance range of the pipe.
Step 2
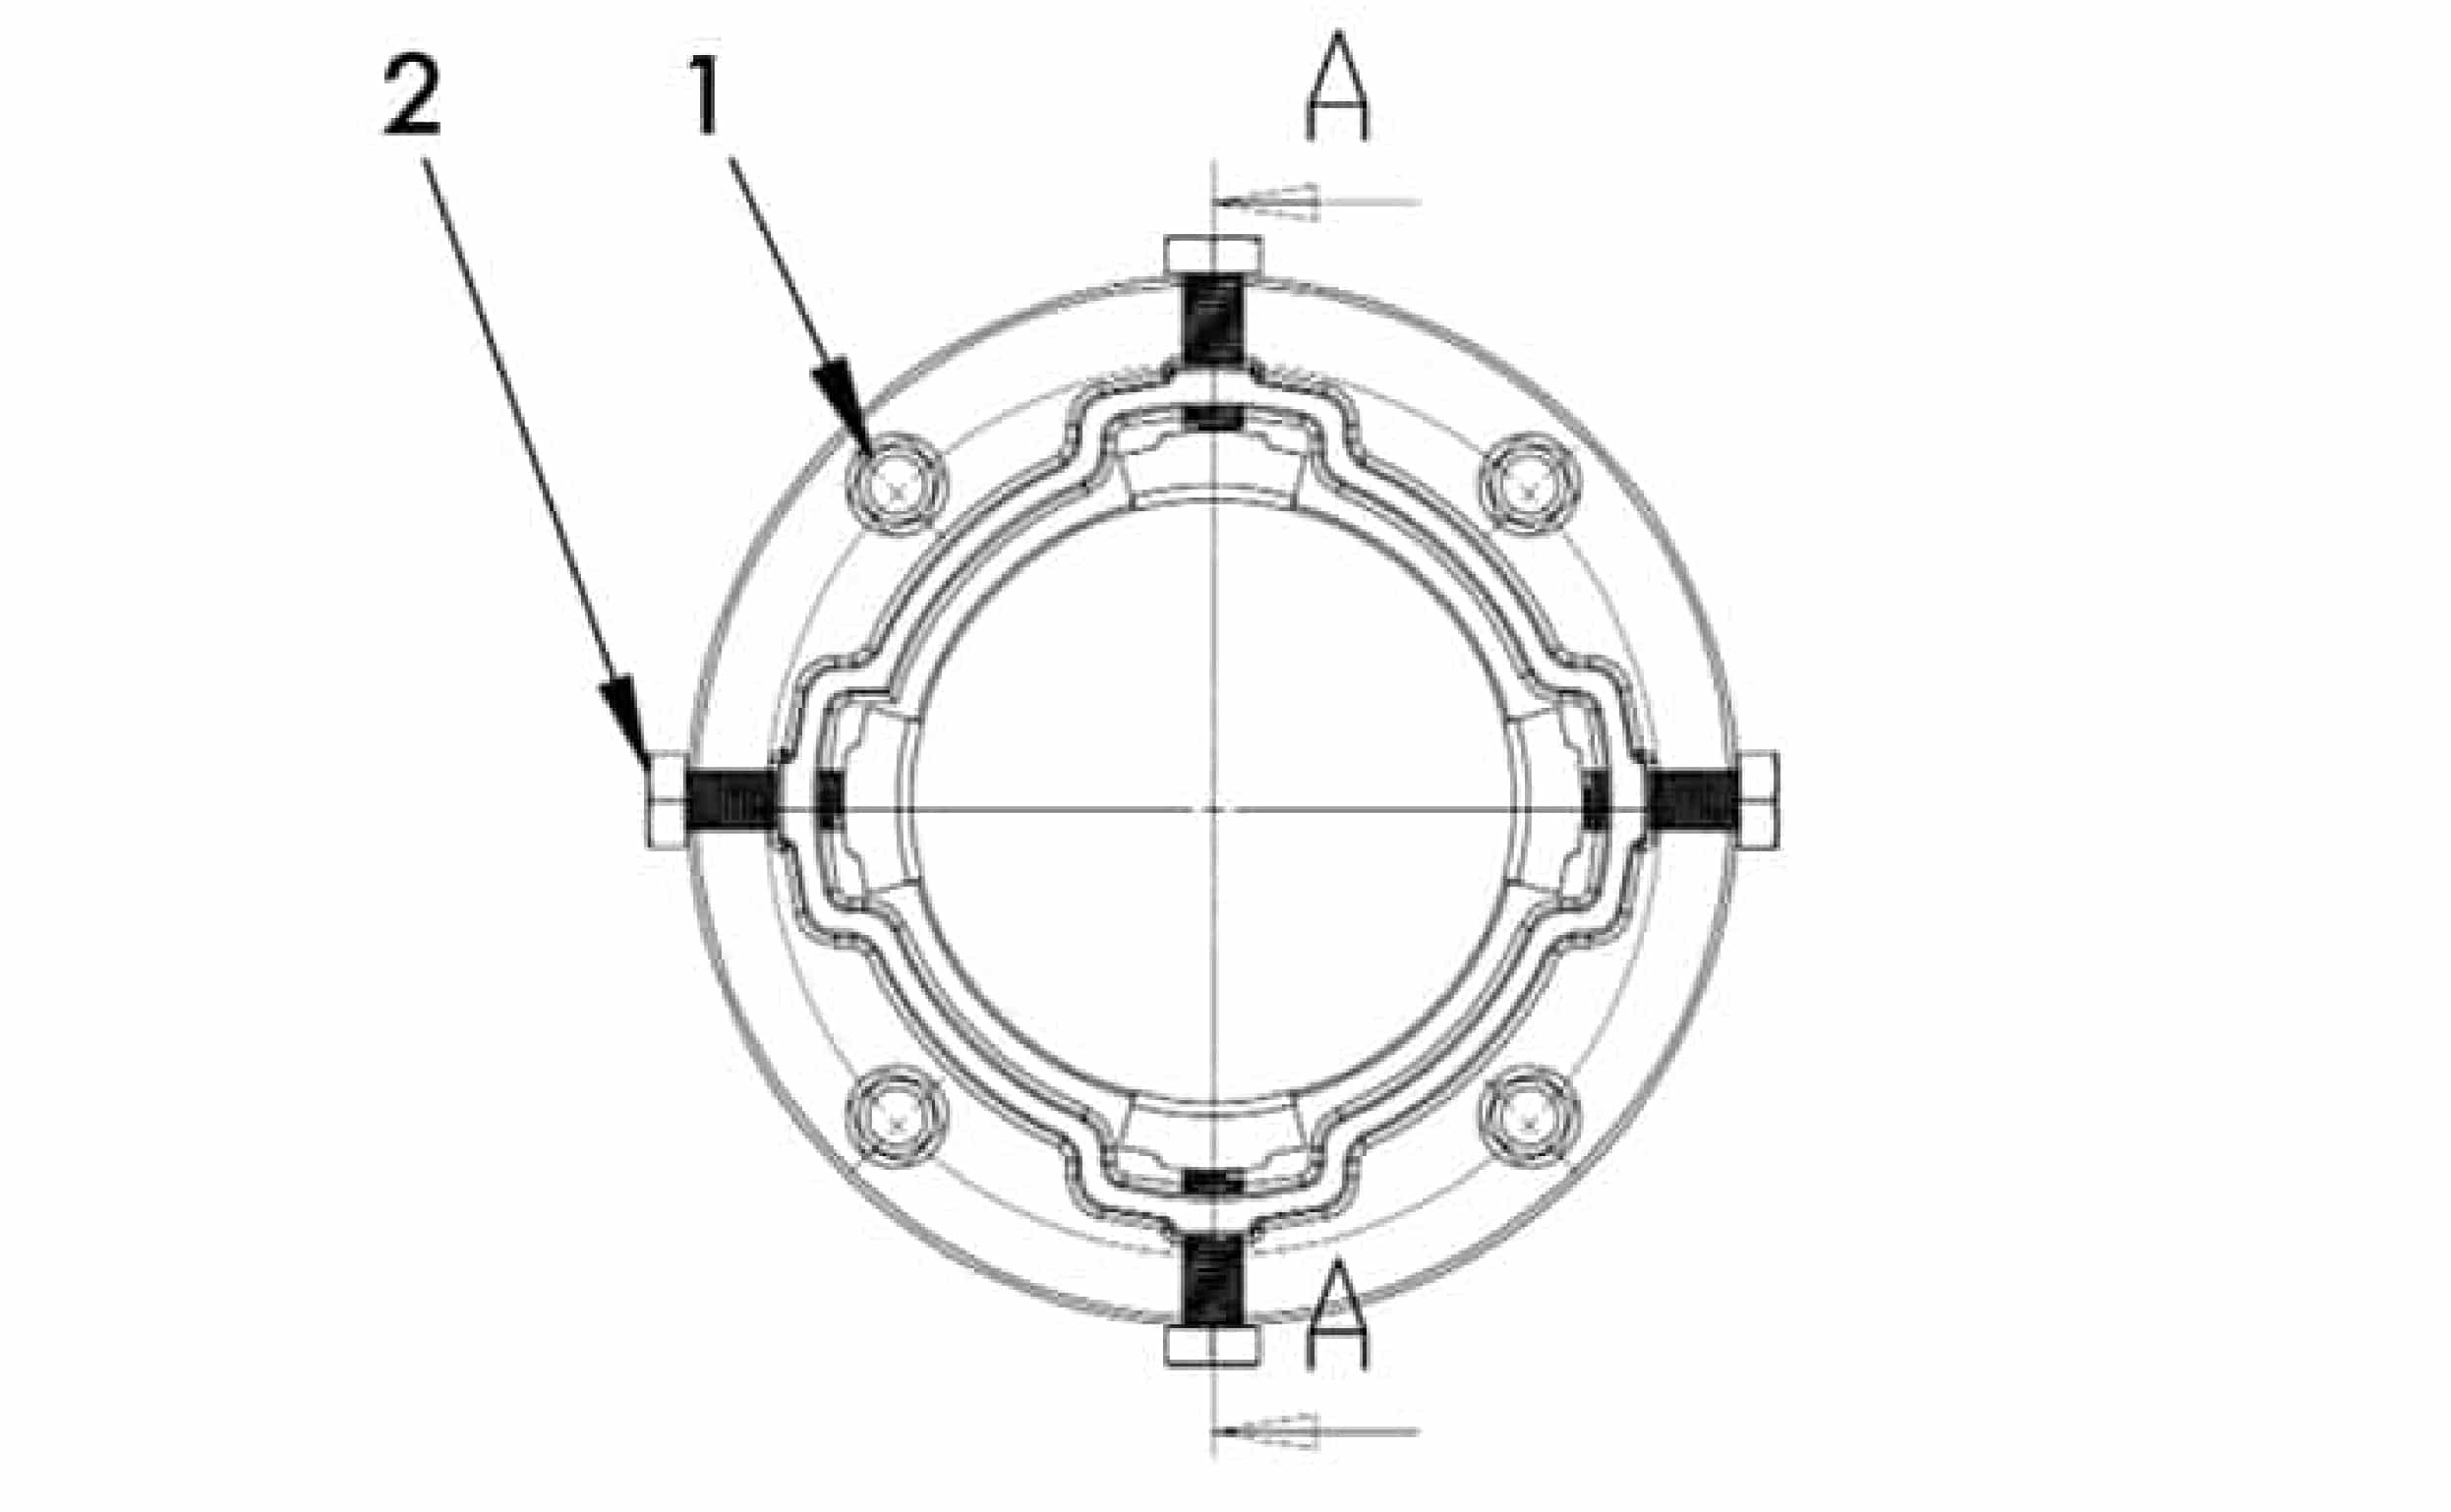
Loosen the long bolts of the mechanical coupling (Fig. No. 1 as below) and the grip bolts (Fig. No. 2 as below) to allow the pipes to be inserted smoothly.
Step 3
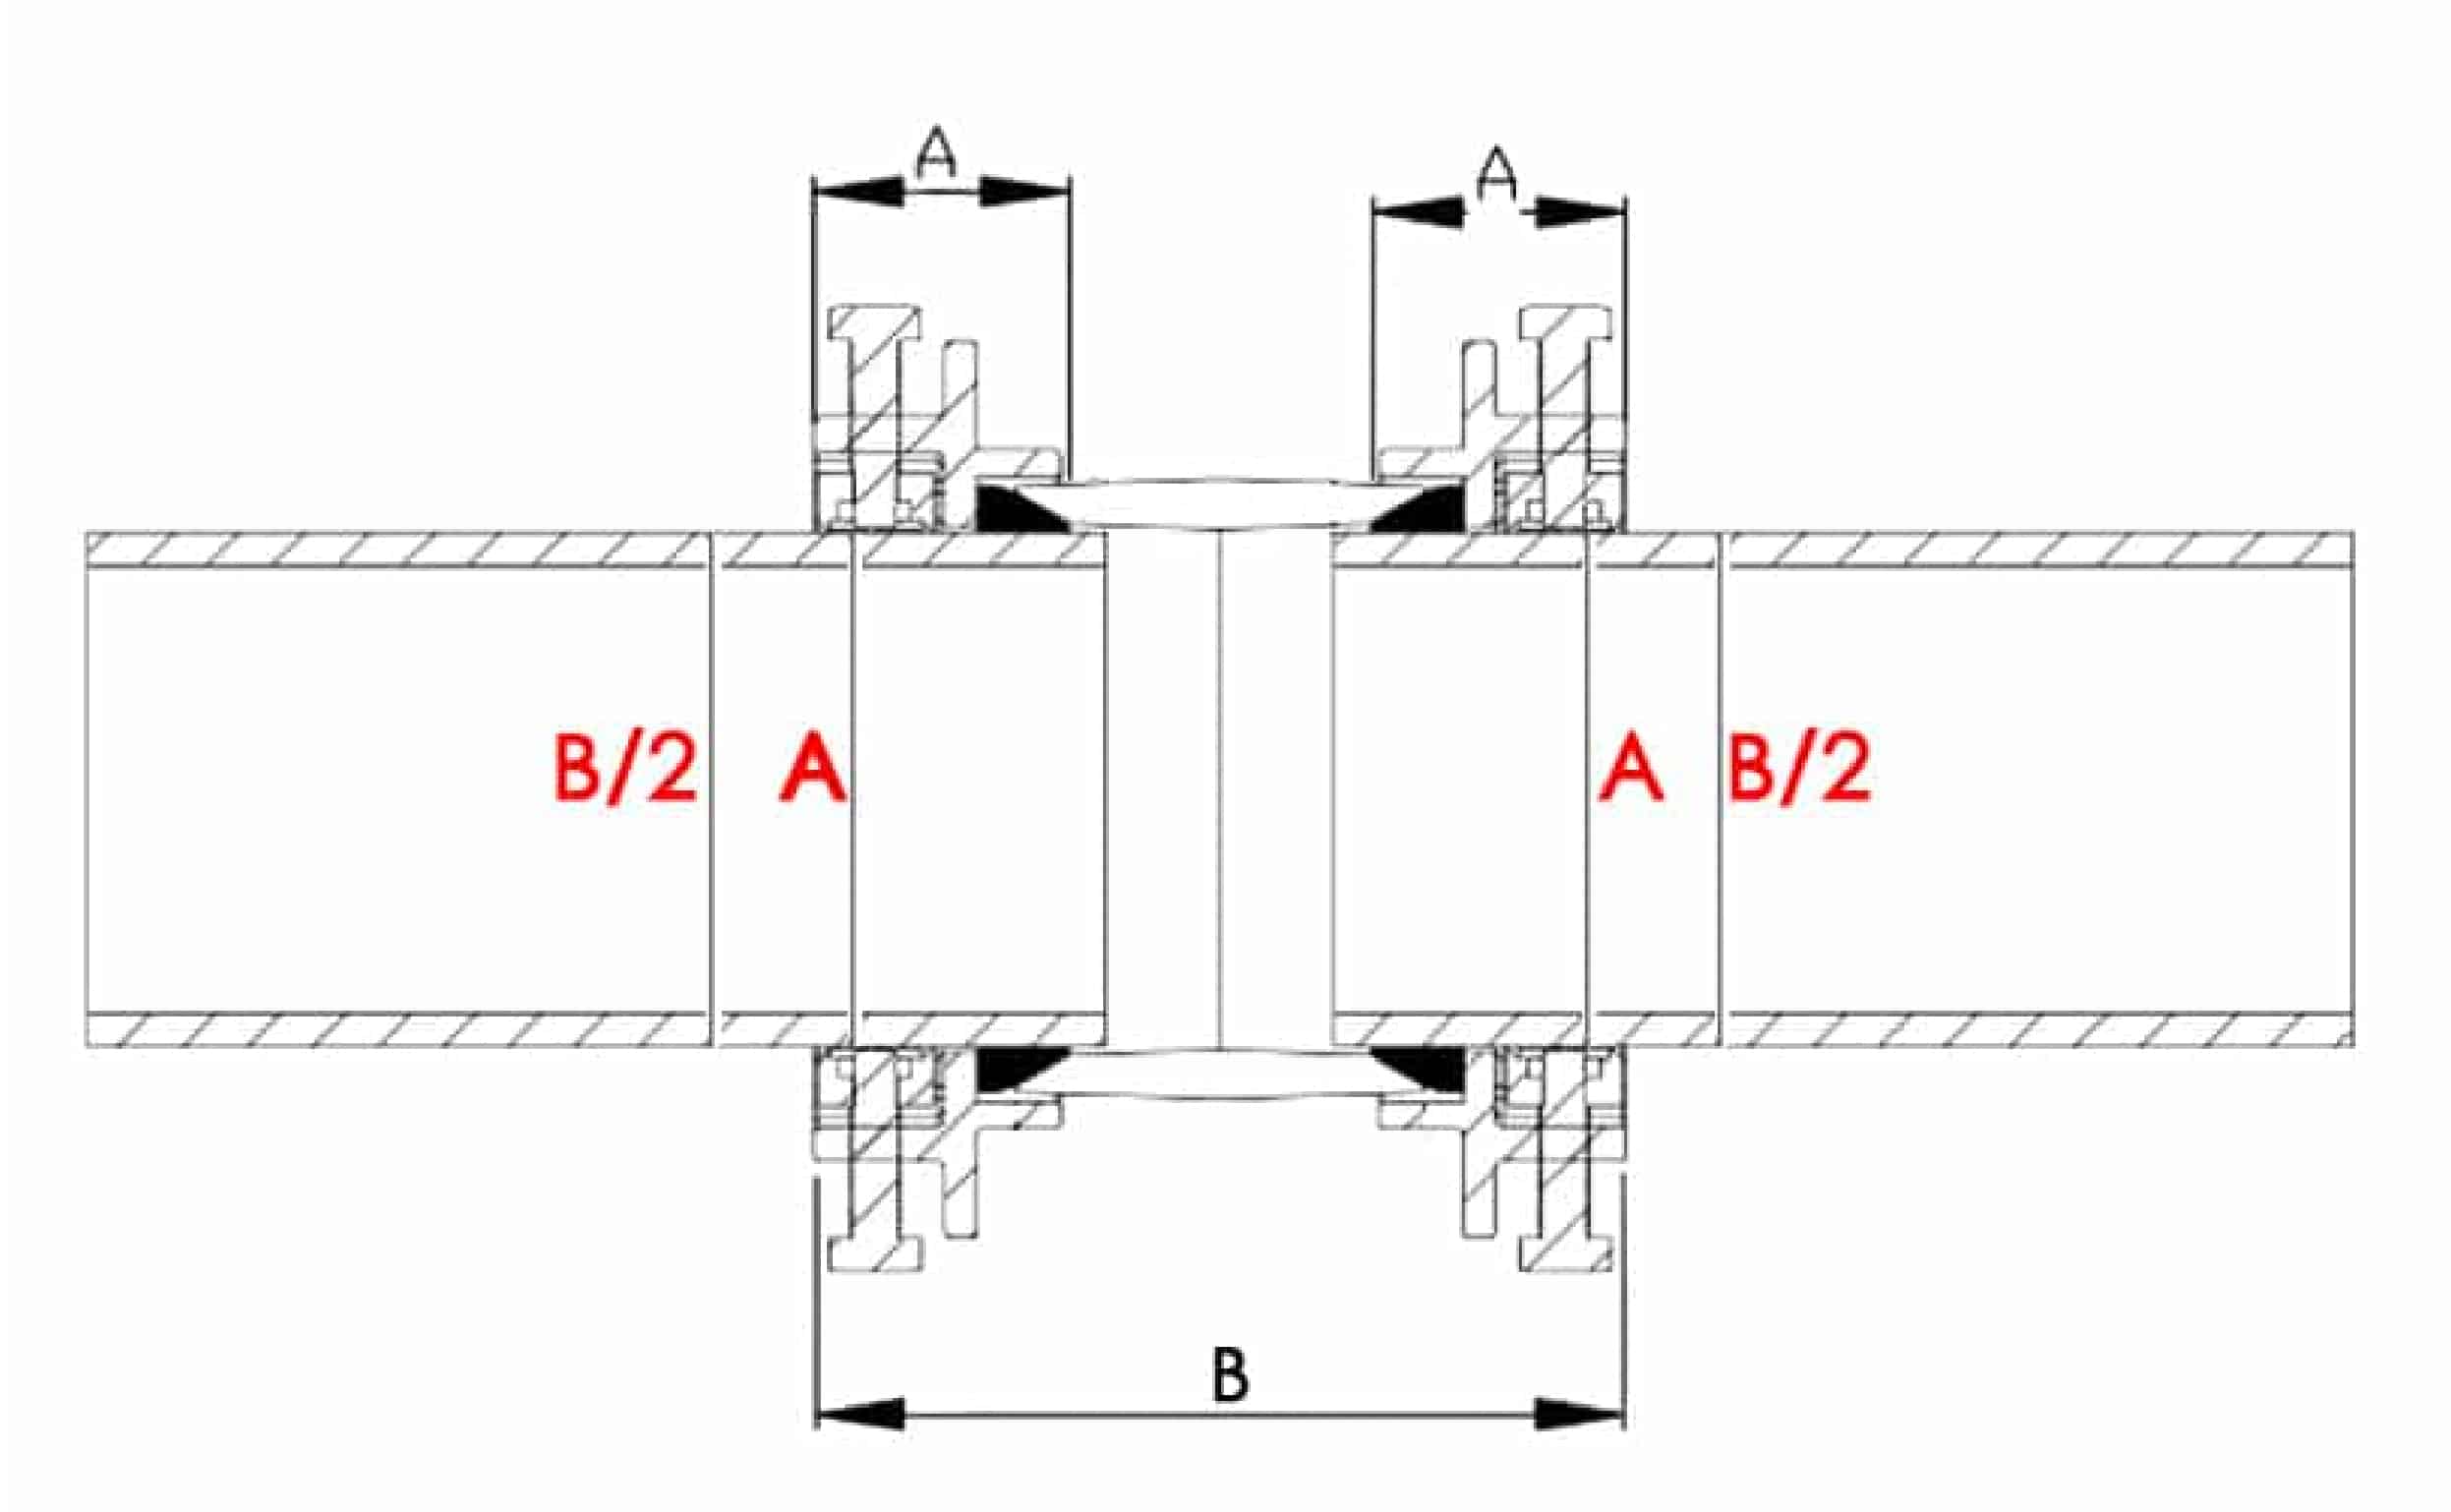
Measure the distance A from the end face of the end ring to the bottom surface of the gasket, and also measure the total length B of the entire product. Measure out the distances A and B/2 from the insertion end of the pipe and mark them clearly. Insert the pipe up to the line marked A into the end ring, but ensure that the line marked B/2 remains outside the end ring.
Step 4
Tighten the long tie rods(Fig No.3 as below) in multiple steps, following a diagonal sequence. Be careful not to tighten the bolts too much one time.
Step 5
First, tighten the grip bolts (Fig. No. 4 as below) in a diagonal sequence until the wedges are snug against the outer circumference of the pipe. Then, in multiple steps, continue to tighten the grip bolts (Fig. No. 4 as below) in a diagonal sequence. Be careful not to overtighten the bolts one time.
Step 6
Repeat step 5 to tighten the grip bolts on the other end(as below Fig No.5).
Step 7
Pressurize the pipeline to 1.5 times the actual working pressure to test for any leaks in the mechanical coupling. If leaks are detected, please repeat steps 4, 5, and 6.
Precaution
Under conditions prone to causing pipe movement, such as thermal expansion and contraction or ground settlement, the long tie rods and grip bolts of the mechanical coupling are likely to loosen. Therefore, it is essential to regularly inspect and retighten them.