PRESSURE REDUCING VALVE MANUFACTURER
Pressure reducing valve (PRV) is a control valve that reduces high inlet pressure to a stable, lower outlet pressure. It is used in fluid and gas systems to ensure safe and efficient operation by maintaining a consistent downstream pressure, regardless of fluctuations in upstream pressure or flow. When the downstream pressure increases, the diaphragm or pilot mechanism partially closes the valve to reduce flow and pressure. When downstream pressure decreases, the valve opens wider to maintain the required pressure.
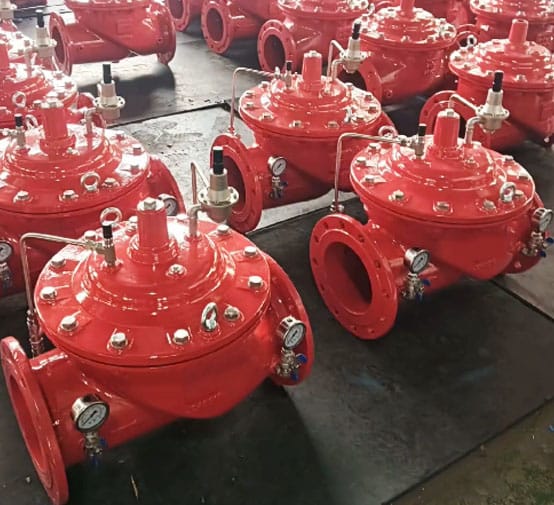
As a pressure reducing valve manufacturer in china, judberd can manufacture pressure reducing valve in ductile iron, brass and stainless steel material ,pressure from PN10 to PN25. Photos are as below
FEATURE
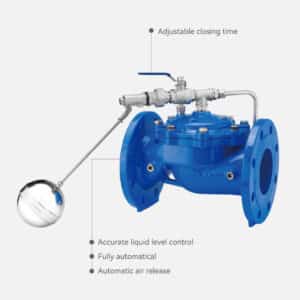
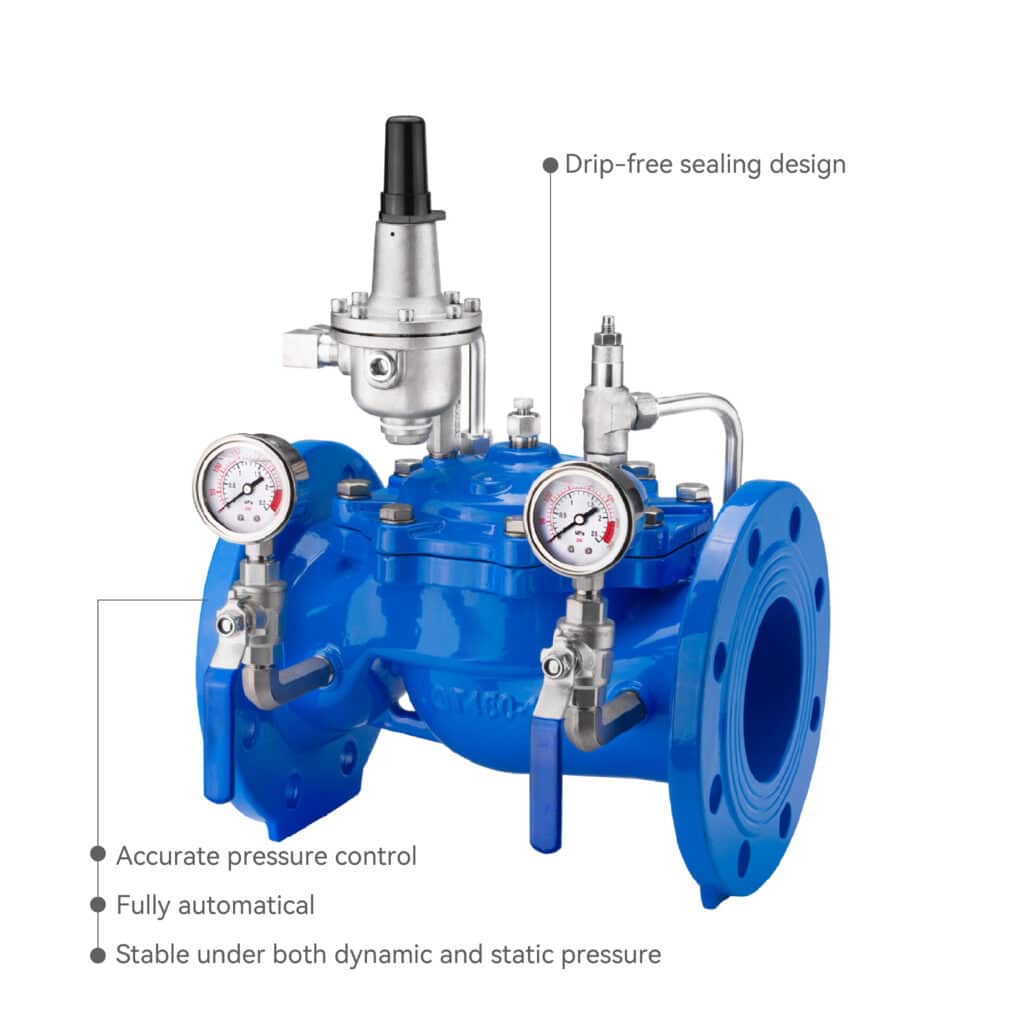
The adjustable pressure reducing valve is used in domestic water supply, fire-fighting water supply, and other industrial water systems. By adjusting the pilot valve, the outlet pressure of the main valve can be regulated.
The outlet pressure remains constant regardless of fluctuations in inlet pressure or flow rate, ensuring safe and reliable operation while maintaining the outlet pressure at the preset value. The set value can also be adjusted as needed to achieve pressure reduction.
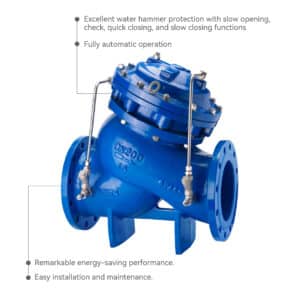
This pressure reducing valve offers Drip-free sealing design,Fully Automatical operation, accurate pressure control, stable performance under both dynamic and static pressure, safety and reliability, easy installation and adjustment, and long service life.

FEATURE
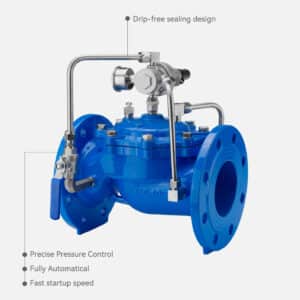
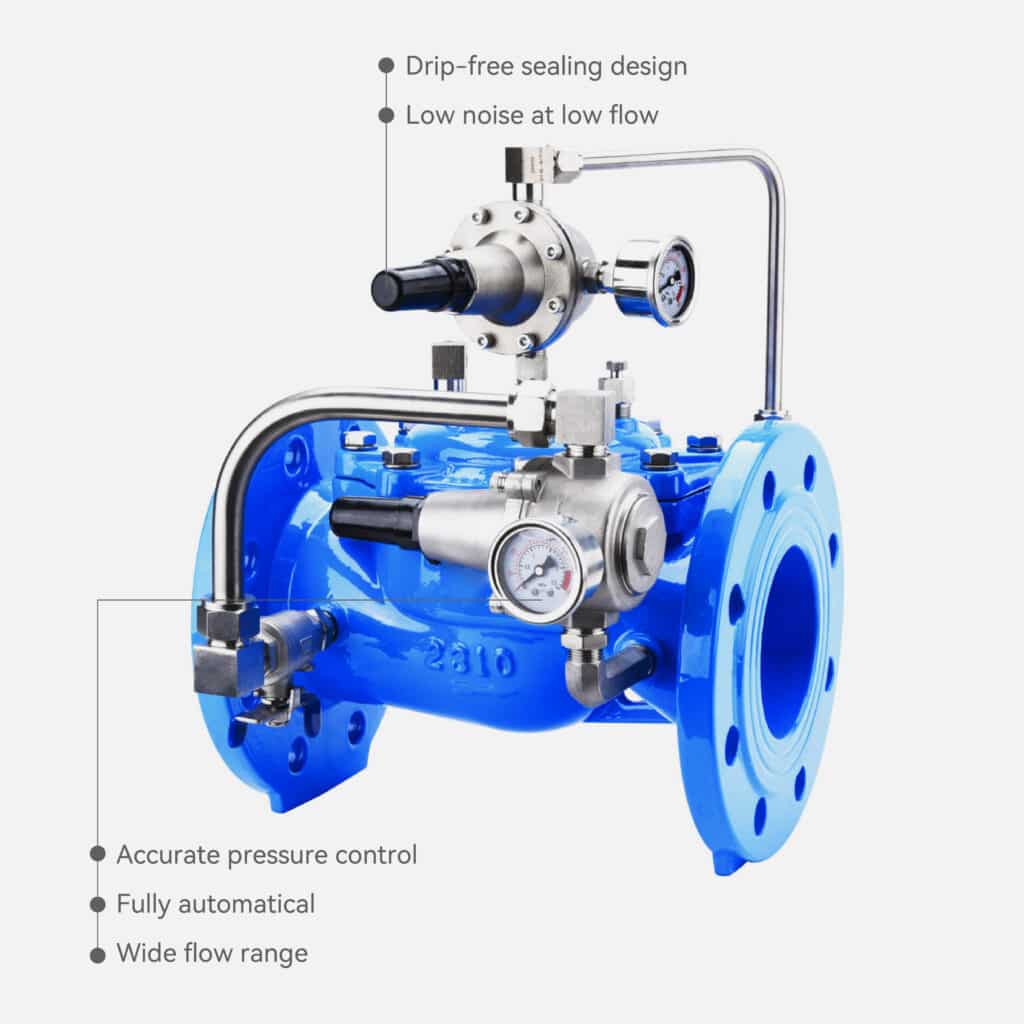
According to requirements, the excessively high inlet pressure is automatically converted into the desired stable lower outlet pressure through the pilot-operated pressure reducing control valve, ensuring that the static pressure remains constant over the long term.
Drip-free sealing design, Low noise at low flow, Accurate Pressure Control , Fully Automatical, Wide flow range
FEATURE
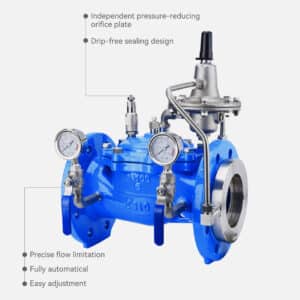
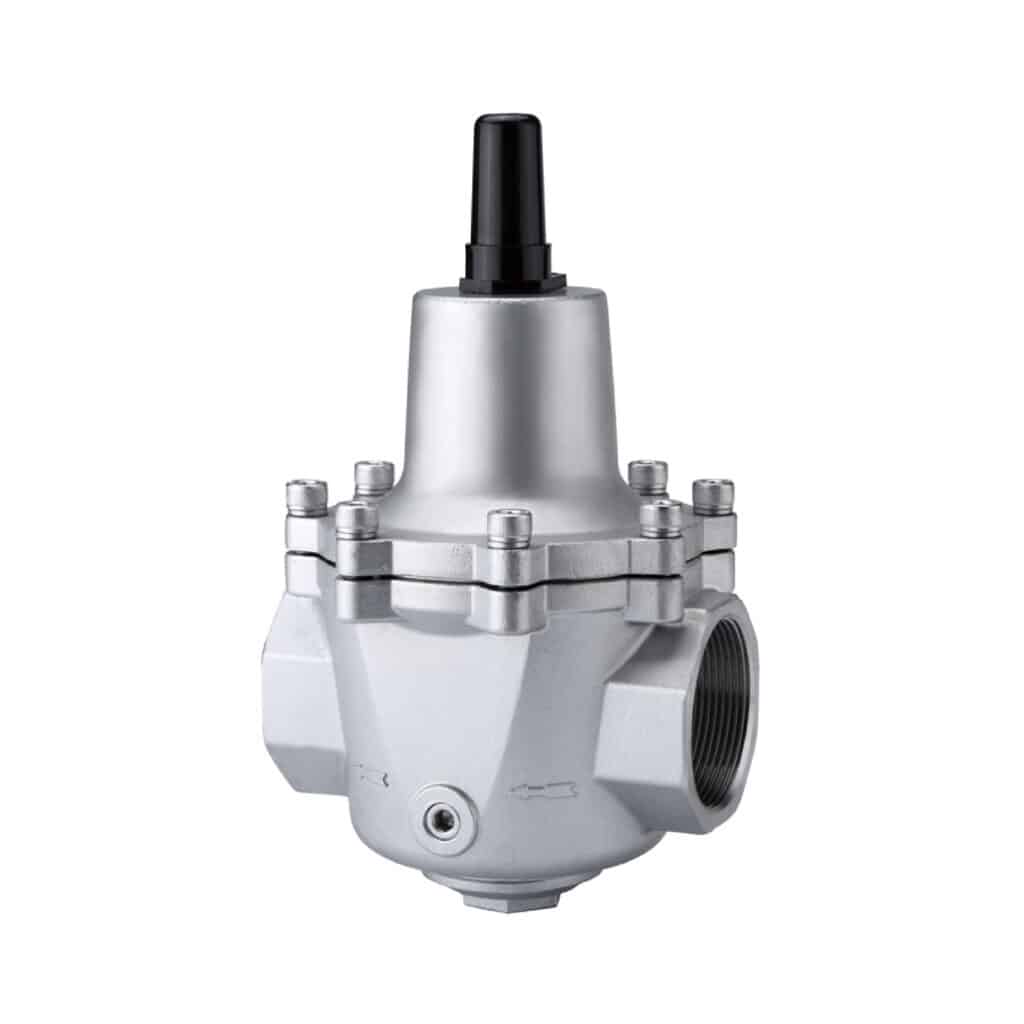
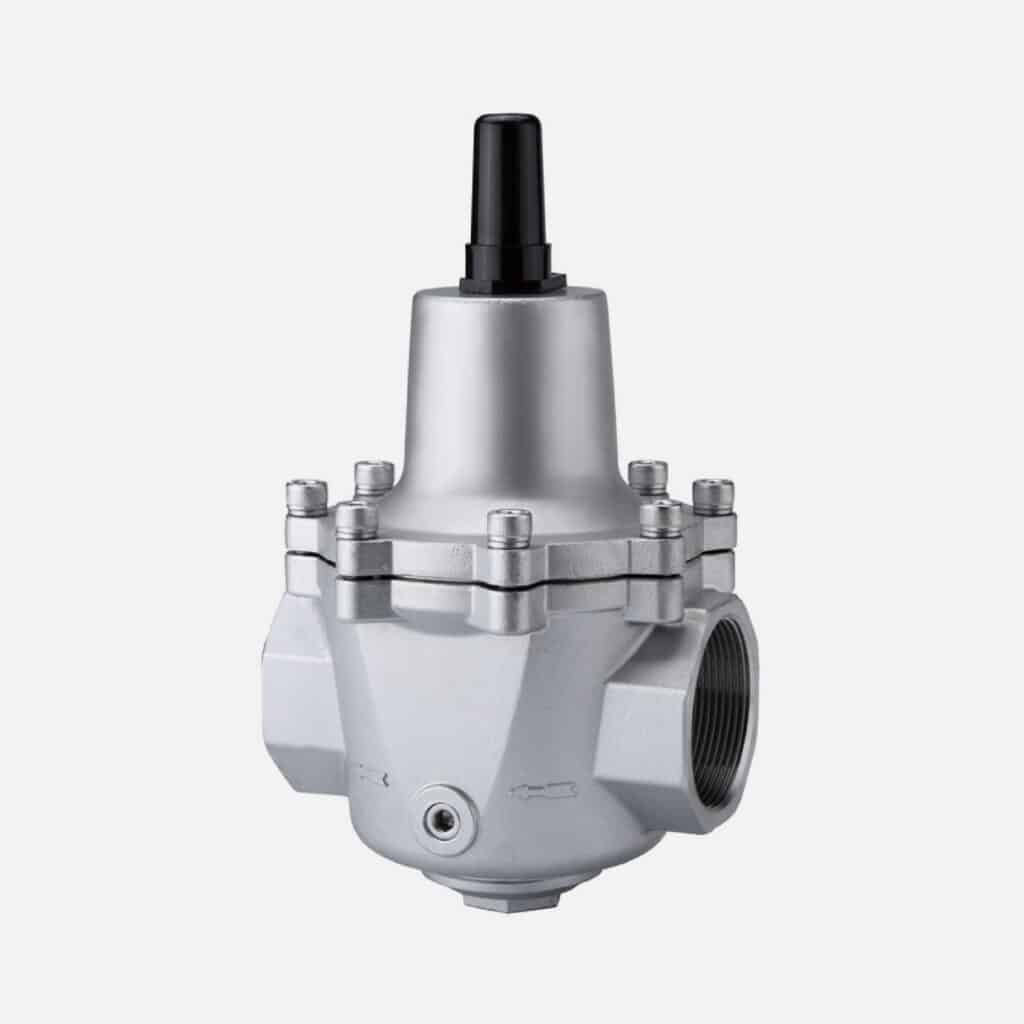
Direct Acting – Precise Pressure Control
Full Bore – Large Flow Capacity
Wide Flow Range
Easy Installation and Maintenance
The PLBP branch threaded pressure reducing valve automatically converts excessively high inlet pressure into the required stable lower outlet pressure, maintaining constant static pressure over the long term
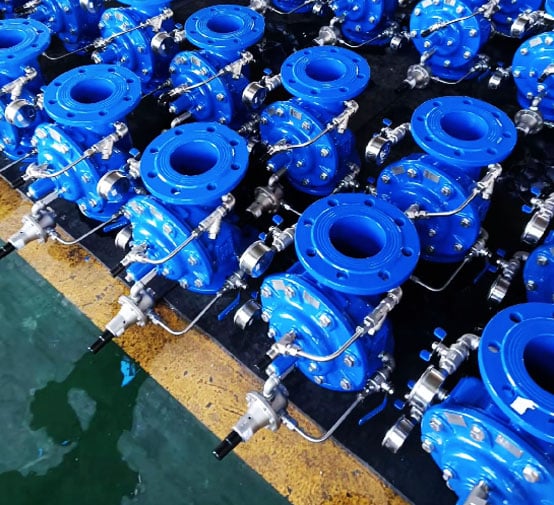
Photos in workshop
Adjustable Pressure Reducing Valve VS Low-Flow Bypass Pressure Reducing Valve VS Full-flow Threaded Branch Pressure Reducing Valve
Adjustable pressure reducing valves (PRVs) play a crucial role in managing water flow and pressure in various systems, ensuring safety, efficiency, and consistency of water supply. Here’s a detailed breakdown of three different types of pressure reducing valves:
1. Adjustable Pressure Reducing Valve
Features
Control Type
_
Pilot-operated
Structure
_
Simple without a bypass system
Adjustment
_
Outlet pressure is adjusted by modifying the pilot valve spring.
Performance
_
Maintains a constant outlet pressure despite fluctuations in inlet pressure or flow.
Applications
Ideal for domestic water supply, fire-fighting, and stable industrial water systems.

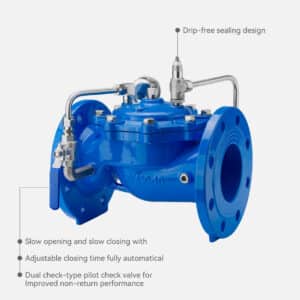
2. Low Flow Bypass Pressure Reducing Valve (PLBP Type)
Features
Control Type
_
Pilot-operated with a bypass circuit
Structure
_
More complex, includes a main valve, pilot control valve, bypass valve, needle valve, micro strainer, and pressure gauges.
Performance
_
Automatically stabilizes outlet pressure, even under low or static flow conditions due to the low-flow bypass feature.
Applications
Suited for municipal water mains, high-rise building supplies, and any variable-pressure systems requiring stable control under high pressure.
3. PLBP Full-flow Threaded Branch Pressure Reducing Valve (Direct-acting Type)
Features
Control Type
_
Direct-acting, no need for external pilot or piping.
Structure
_
Compact with a full-bore design for high flow capacity and minimal pressure loss.
Performance
_
Reduces high inlet pressure to stable, lower outlet pressure effectively.
Applications
Best for building water supply branch lines, equipment inlets, HVAC systems, and local pressure regulation for small to medium flow systems.
4. Comparison Table
| Comparison | Adjustable Pressure Reducing Valve | Low Flow Bypass Pressure Reducing Valve (PLBP Type) | PLBP Full-flow Threaded Branch Pressure Reducing Valve |
|---|---|---|---|
| Control Type | Pilot-operated | Pilot-operated + bypass circuit | Direct-acting (no pilot) |
| Structural Complexity | Moderate | Most complex (with bypass system) | Simplest, compact |
| Low-flow Performance | Moderate, may fluctuate | Excellent, stable even at near-zero flow | Good, but not for extremely low flow |
| Pressure Range | Medium pressure | High pressure | Medium pressure |
| Installation & Maintenance | Normal difficulty | Complex, for large systems | Easiest, for small pipelines |
| Typical Application | General domestic or industrial | High-pressure mains, variable-flow systems | Branch lines, small systems, local pressure control |
Summary
Adjustable Pressure Reducing Valve
_
Ideal for standard, steady-flow systems.
Low Flow Bypass Pressure Reducing Valve
_
Best for variable-flow conditions requiring high-performance pressure stabilization.
Full-flow Threaded Branch Pressure Reducing Valve
_
Compact and efficient for local pressure control in smaller systems.
This comparative overview aids in selecting the appropriate pressure reducing valve based on specific system requirements, ensuring optimal performance and safety.
SELECTION GUIDE
Selecting the right Pressure Reducing Valve (PRV) is crucial to ensure your pipeline system operates safely and efficiently.
The right choice depends on the fluid, pressure range, pressure drop, installation location, and connection type.
CHOOSE BASED ON THE FLUID
| Medium | Recommended Material | Valve Type | Seal Type |
|---|---|---|---|
| Clean Water | Brass / Ductile Iron | Spring / Diaphragm | EPDM |
| Hot Water | Stainless Steel / Brass | Piston | Heat-resistant EPDM |
| Steam | Stainless Steel | Piston with heat protection | PTFE |
| Compressed Air | Brass / Stainless Steel | Diaphragm | NBR |
| Oil | Carbon Steel / Stainless Steel | Piston | NBR or FKM |
| Seawater | SS316 / Copper-nickel Alloy | Anti-corrosion type | EPDM / FKM |
CHOOSE BASED ON PRESSURE RANGE
| Inlet Pressure | Recommended Type | Features |
|---|---|---|
| ≤ 1.6 MPa | Diaphragm / Spring | Easy to adjust, cost-effective |
| 1.6–2.5 MPa | Piston | High durability |
| > 2.5 MPa | Pilot-operated | Stable & precise control |
CHOOSE BASED ON PRESSURE DROP
| Reduction Ratio | Recommendation |
|---|---|
| ≤ 3:1 | Standard spring-type PRV |
| 3:1 to 10:1 | Use piston or pilot-type PRV |
| > 10:1 | Use two-stage PRVs (multi-level control) |
CHOOSE BASED ON PIPE SIZE & CONNECTION TYPE
| Pipe Size | Recommended Connection |
|---|---|
| DN15 – DN50 | Threaded |
| DN65 and above | Flanged |
| Special systems | Welded or custom |
CHOOSE BASED ON INSTALLATION LOCATION
| Environment | Surface Coating / Material |
|---|---|
| Outdoor / UV | Polyester FBE coating |
| Underground | Epoxy powder coating (moisture-resistant) |
| Coastal / Salty Air | SS316 or high corrosion coating |
| High Temperature | Heat-resistant seals & structure |
OPTIONAL FEATURES
Built-in filter for dirty fluids
Bypass pipe for easy maintenance
Pressure gauge ports for monitoring
Smart PRV with remote pressure control (on request)
INSTALLATION
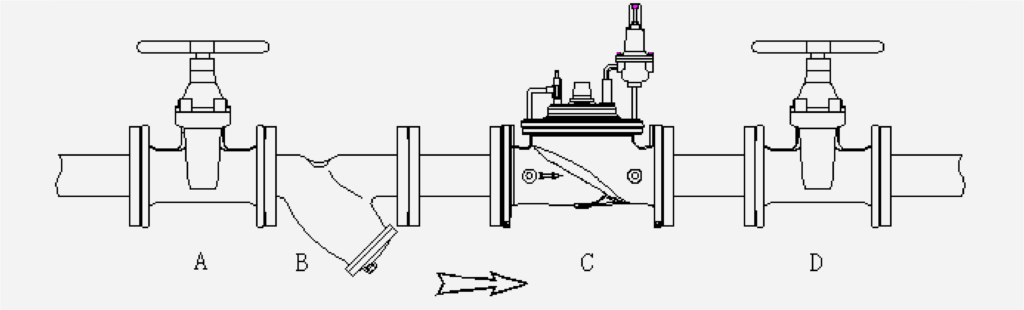
A.INLET ISOLATION VALVE. B.STRAINER. C.PRESSURE REDUCING VALVE. D.OUTLET ISOLATION VALVE.
01
Make sure that the flow direction of the pipeline is in accordance with the arrow of the pressure reducing valve
02
Allow sufficient space for adjustment and disassembly.
03
Install the isolation valve( isolation can be gate valve, butterfly valve or globe valve etc )in the inlet and outlet of the pressure reducing valve.
04
Install a strainer in front of the pressure reducing valve.
05
The valve will work better if it is mounted horizontally.
06
After installation, clean the pipes and strainer.
PRESSURE REDUCING VALVE ADJUSTMENTN
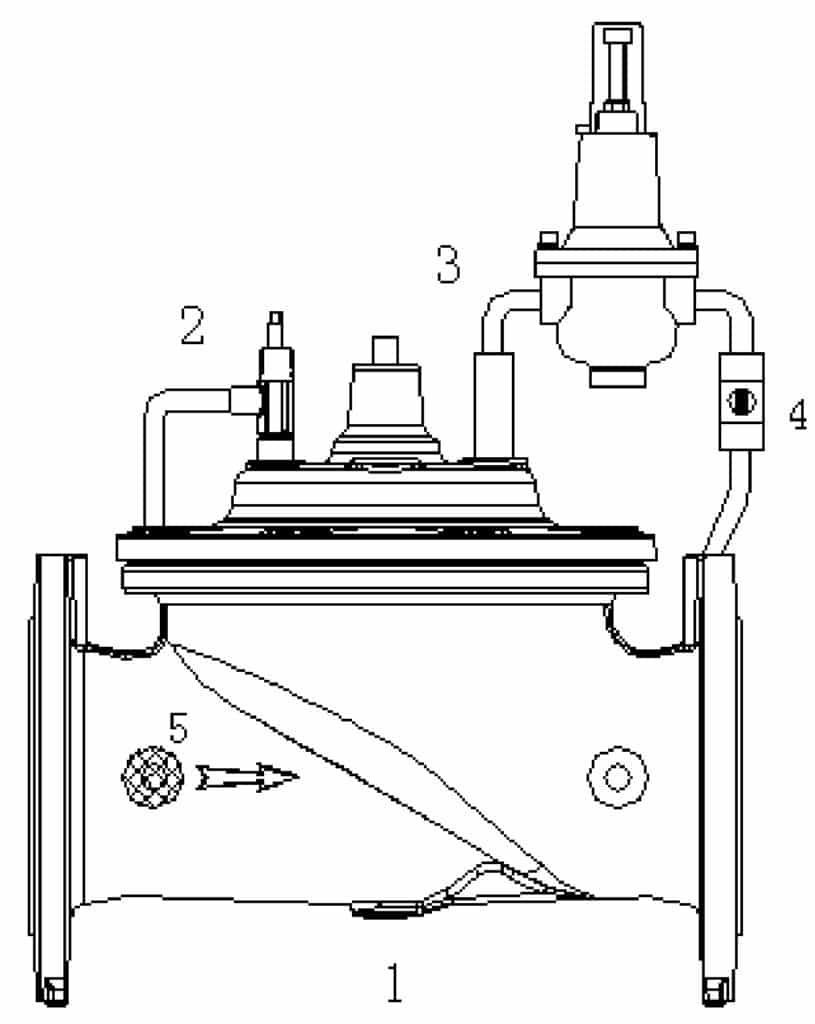
1. MAIN VALVE. 2. NEEDLE VALVE. 3. PILOT VALVES. 4. BALL VALVES. 5. STRAINERS
01
Open all isolation valves in the pipeline.
Remove the cover of pilot valve and loosen the nut of the pilot valve.
02
Observe the setting on the pressure reducing pilot valve unit (No. 3). The usual factory outlet pressure is 4 bar. if 4 bar is higher than required, turn the adjustment nut counterclockwise. The pressure changes by approx. 0.5 bar / one turn until the desired pressure is approached.
Warning: The actual pressure setting must be made under pipe flow conditions.
03
Slowly open the inlet isolation valve to pressurise the main valve.
04
Expel air from the main valve cover by loosening the pipe plug in the middle of the cover. Once all air has been exhausted, tighten the plug.
05
Open the downstream isolation valve slightly to establish a low flow in the pipework.
06
Slowly adjust the pilot valve nut and observe the downstream pressure gauge until the desired pressure is reached (clockwise to increase or counterclockwise to decrease).
07
Slowly adjust the needle valve until the desired valve opening or closing speed is achieved.
08
All valve adjustments have been set. Lock the nut and close the cover.
MAINTENANCE
1. Check the valves and piping regularly every month, whether the pilot valve is bumped or loosened due to leaks, to check that the pressure or flow control is stable.
2. Outside leaks are easily dealt with by tightening fasteners.
3. If the valve does not work, there may be possible causes, analyse the problem and solve it. See Below Fault shooting Table:
| Symptom | No. | Possible reason | Solution |
|---|---|---|---|
| Main valve does not open | 1 | No pressure at valve inlet | Check inlet pressure |
| 2 | Main valve diaphragm assembly not working | Disassemble, clean stem, replace test parts | |
| 3 | Pilot valve assembly not opening: no spring compression | Tighten adjustment screw | |
| 4 | Ball valve in pilot valve system is closed | Open it | |
| 5 | Spring guide not in place | Assemble correctly | |
| 6 | Guide valve does not work | Assemble correctly | |
| Main valve does not close | 1 | Foreign body between disc and seat, wear | Disassemble main valve, remove foreign body, clean parts, replace defective parts |
| 2 | Needle valve closed | Correctly opened | |
| 2 | Pilot valve stays open: spring compresses solid, mechanical obstruction, | disassembly and removal Obstructions | |
| 3 | Valve flap worn | Disassemble and replace | |
| 4 | Pilot valve does not open | Correct assembling | |
| 5 | Diaphragm worn | Disassembly and replacement | |
| Cannot be adjusted | 1 | Air in main valve cover and/or conduit | Loosen top cover plug or fitting and vent |
| 2 | Pilot valve nut blocked exhaust port | Assembled correctly | |
| 3 | Pilot spring not in correct range for control | Replace spring |
Inspection or maintenance can be carried out without dismantling the valve. It is recommended that accessories such as new diaphragms and flaps are prepared before work begins.
WARNING: Attempting to disassemble the valve while the pipeline is under pressure may injure maintenance person and damage the equipment.
PRESSURE REDUCING VALVE HYDRAULIC
The function of a pressure reducing valve is to reduce the pressure in the pipeline, so the outlet pressure ≤ the inlet pressure, for example,
PN25 pressure reducing valve, then the inlet can be any pressure between 0-25 bar, and the outlet pressure should be both ≤ 25 bar and ≤ the inlet pressure