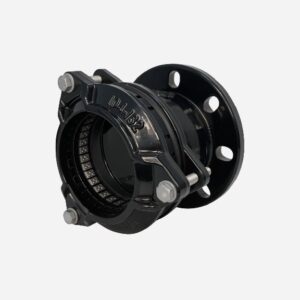
UltraGrip Coupling
Feature
● Suitable for water systems
● Multigrip restrained
● working pressure PN10/16
● Maximum temperature -10℃ to +70℃
● suitable for potable water, neutral liquids and sewage
● WRAS ,ACS,DVGW etc approved is available
● Coating standard EN30677
● Test standard EN12266-1
● Wide tolerance range
● Corrosion resistant construction
● Maximum angular deflection: ±3°for each size
● various coating
● Seal:NBR ,EPDM etc
Precaution
Ultra grip coupling can’t accommodate for AC(Asbestos cement) pipe and GRP pipe.Because AC pipe surface is too rough ,the griper of ultra grip coupling can’t work properly.GRP pipe is very smooth, can’t offer enough friction for the griper


OVERVIEW
This coupling is a product designed for plain-end pipe connections, equipped with an axial anti-pull-out mechanism and excellent sealing performance. It can be used to connect pipes made of various materials, including ductile iron, grey cast iron, steel, PVC, and PE. This design specifically includes a locking mechanism for PE pipes — the tightening component (such as the stainless steel grip ring shown below) is detachable, allowing for easy removal and installation.
When connecting HDPE pipes, as long as the pipe is SDR ≥ 11, a stainless steel stiffener must be installed when using this coupling — especially for thin-wall grades such as SDR17, 21, 26, 33, and 41. Even for SDR11, it is strongly recommended to install a stiffener under pressure or tension conditions.
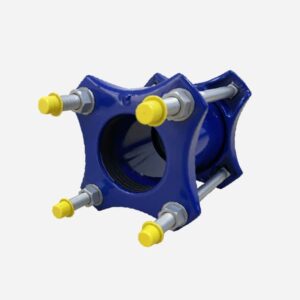
This product uses independent bolt tightening on both ends, making it easier to connect pipes with different outside diameters (as long as the diameters fall within the sealing range of the product). Simply tightening the bolts on each end achieves sealing. It is more user-friendly than standard stepped couplings.
This product is easy to install. It is pre-assembled in our factory, so during actual use, you only need to insert the pipes into the appropriate depth of the coupling and tighten the bolts on both ends to achieve secure and leak-proof connection. Due to its simple installation process, it is especially suitable for applications in confined spaces.

USE
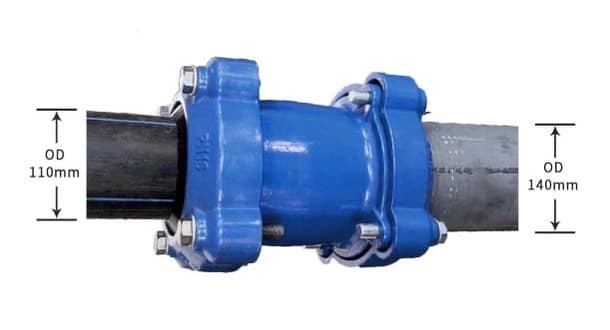
Both ends can connect pipes with the same outer diameter or different outer diameters at the same time,
as long as the design range of Mechanical Coupling Joint includes the outer diameter of the pipes
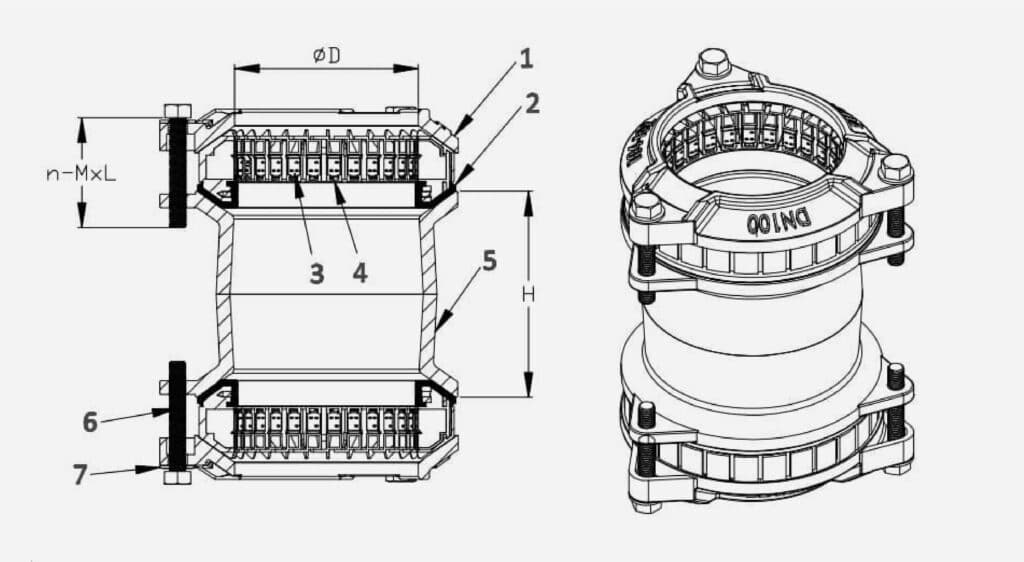
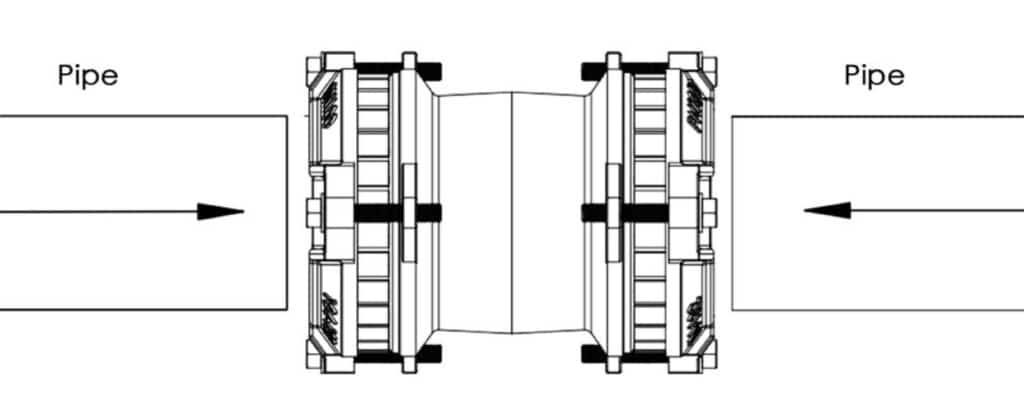
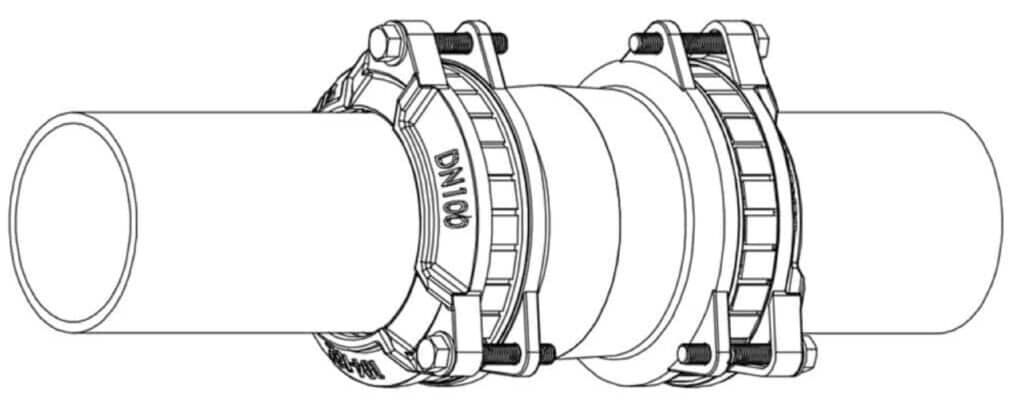
Drawing
Material
| Item No. | Parts | Material |
|---|---|---|
| 1 | End Rings | Ductile Iron EN GJS450-10 according to EN1563 |
| 2 | Gasket | EPDM Compound Grade E to BS EN 681-1 /Nitrile Compound to Grade G BS EN 682, Type G |
| 3 | Gripper | SS304 |
| 4 | Retractable Ring | POM(polyvinylchlorid) |
| 5 | Center Sleeve | Ductile Iron EN GJS450-10 according to EN1563 |
| 6 | Bolts | Grade 8.8 carbon steel or Stainless Steel |
| 7 | Washer | Grade 8.8 carbon steel or Stainless Steel |
| 8 | Coating | Rilsan Nylon 11 or FBE coating(Adhesion is not less than 12 N/mm2) |
Options:Grade 4.8/6.8/8.8 carbon steel bolts with galvanization/dacromet/teflon etc
Stainless steel SS304/SS316/SS316L/A2/A4 etc bolts
Dimension
| DN | PN | RANGE | ∮D | H | n-MxL |
|---|---|---|---|---|---|
| 50 | PN10/16 | 46-71 | 73 | 150 | 3-M12x80 |
| 60/65 | PN10/16 | 63-90 | 92 | 150 | 3-M12x80 |
| 80 | PN10/16 | 84-105 | 107 | 150 | 3-M12x80 |
| 100 | PN10/16 | 104-132 | 134 | 150 | 3-M12x80 |
| 125 | PN10/16 | 132-155 | 157.5 | 150 | 3-M14x80 |
| 150 | PN10/16 | 154-192 | 194.5 | 180 | 3-M14x100 |
| 200 | PN10/16 | 192-232 | 235 | 180 | 4-M14x100 |
| 250 | PN10/16 | 267-310 | 313 | 200 | 4-M14x110 |
| 300 | PN10/16 | 315-356 | 359 | 200 | 6-M14x110 |
| 350 | PN10/16 | 352-393 | 396 | 200 | 6-M14x110 |
| 400 | PN10/16 | 392-433 | 436 | 200 | 8-M14x110 |
| 450 | PN10/16 | 450-482 | 485 | 250 | 8-M16x120 |
| 500 | PN10/16 | 500-532 | 535 | 250 | 8-M16x120 |
| 600 | PN10/16 | 605-637 | 640 | 250 | 8-M16x120 |
Installation
Step 1
Select the appropriate coupling based on the outside diameter of the pipes to be connected, ensuring that the coupling is suitable for pipe material (Judberd’s UltraGrip Coupling is suitable for ductile iron, grey cast iron, steel, PVC, and PE pipes) and the working pressure.Carefully inspect the coupling’s appearance to ensure there is no damage, deformation, or corrosion, especially checking whether the sealing ring and locking ring are intact.If connecting PE pipes, stainless steel grip rings (as shown below) must be assembled.

When connecting HDPE pipes, as long as the pipe is SDR ≥ 11, a stainless steel stiffener must be installed in HDPE Pipes—especially for thin-wall grades such as SDR17, 21, 26, 33, and 41. Even for SDR11, it is strongly recommended to install the stiffener under pressure or tension conditions.If connecting pipes made of other materials, the stainless steel grip rings must be removed.
Stainless Steel Stiffener
Step 2
Clean the pipe ends and contact surfaces of coupling to ensure they are free of oil and debris, in order to ensure sealing performance.
Step 3
3-1. Judberd’s UltraGrip Coupling is pre-assembled. During installation, simply insert the pipes into the coupling to the appropriate depth (refer to Judberd’s technical parameter table for recommended insertion depth), then tighten the bolts on one end diagonally, in multiple passes, to the specified torque: 65–70 N·m. Repeat the same steps to tighten the bolts on the other end.
This enables easy connection and anti-pull-out locking. The simple installation process makes it especially suitable for confined spaces.
3-2. If the product is not pre-assembled, please follow the steps below for installation.
Disassemble all components (bolts, end rings, plastic grip segments, sealing rings, center sleeve). Sequentially slide the components onto the pipe in the following order: end ring– plastic grip segment – gasket – center barrel – gasket –plastic grip segment – end ring.
After sliding on the grip segments, adjust the spacing between the grip blocks to make the gaps even. After adjustment, ensure the end rings and grip rings are perpendicular to the pipe.
Step 4
Use bolts to connect the end rings and the center barrel on both sides. Tighten the bolts on one end diagonally, in multiple passes, with even force, to the specified torque: 65–70 N·m. Then repeat the same steps to tighten the bolts on the other end.
Step 5
Installation complete.